Are you looking for the best camera for makeup artist? That’s why you’re here and I’m going to help you out. Here are the best ways to improve your makeup photography.
Are you a makeup artist and wondering what camera to buy? Do you want to get that perfect shot of your latest beauty product? Here is our list of what we consider the best cameras for makeup photography.
A makeup artist’s best friend is a good camera. Of course, it’s not always possible to use your best camera setup when shooting makeup tutorials, and that’s where your phone camera comes in handy!
Which camera is best for beauty photography? I cover the cameras that work great in low light and those to choose if you have a tight budget.
As a professional makeup artist I was always buying new products to learn and improve my makeup artistry. As a photographer, I love the idea of taking pictures of my work, but the one problem that I had before was how can I take pictures of my work without having the makeup looking dull?
There are so many different cameras out there. Professional and amateur photographers often wonder which camera they should choose. That’s because they come with various features, including lenses, cameras, and fingerprint identification.
Best camera for beauty photography
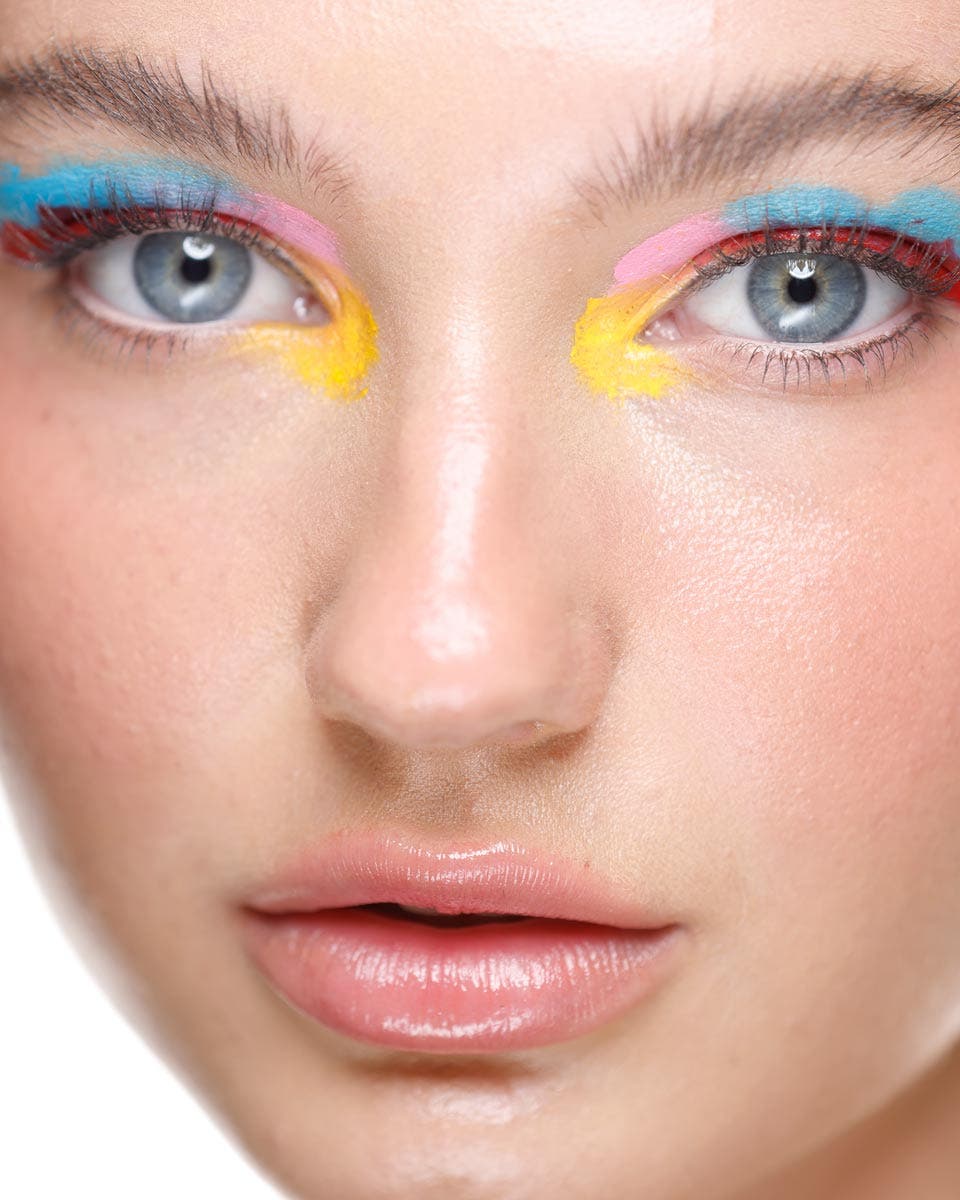
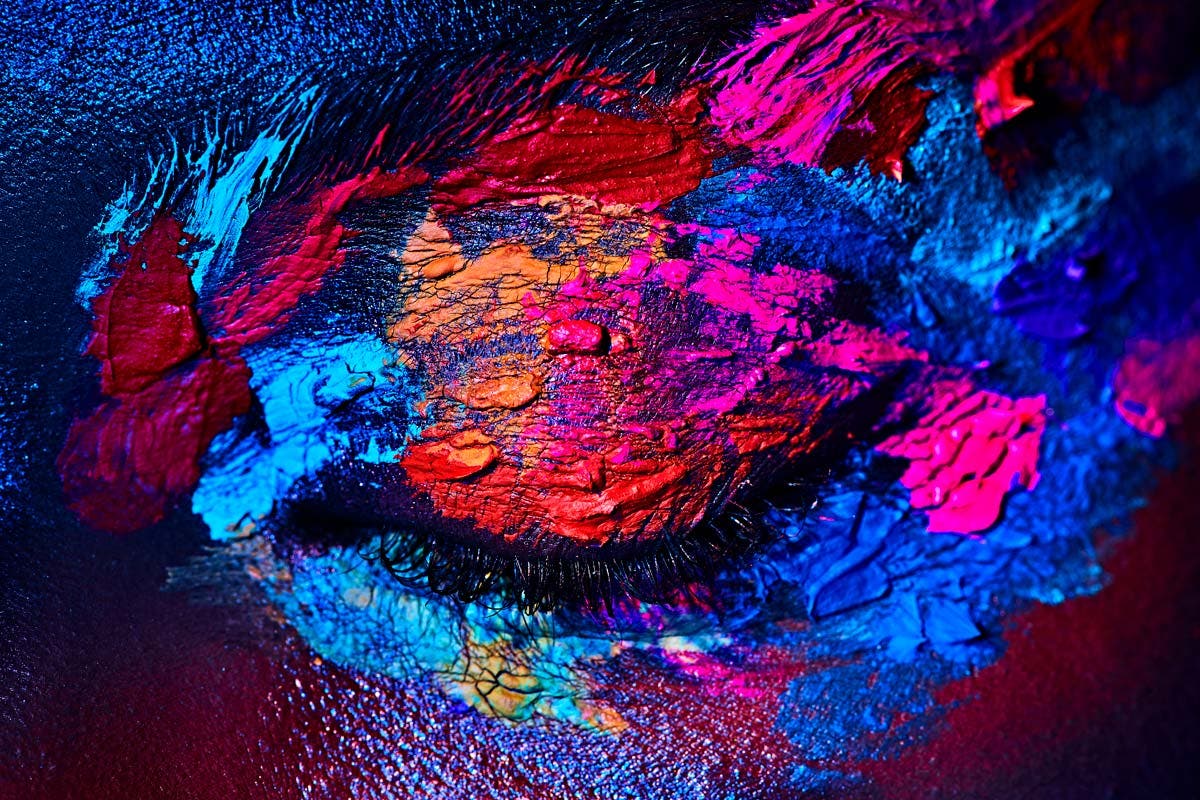
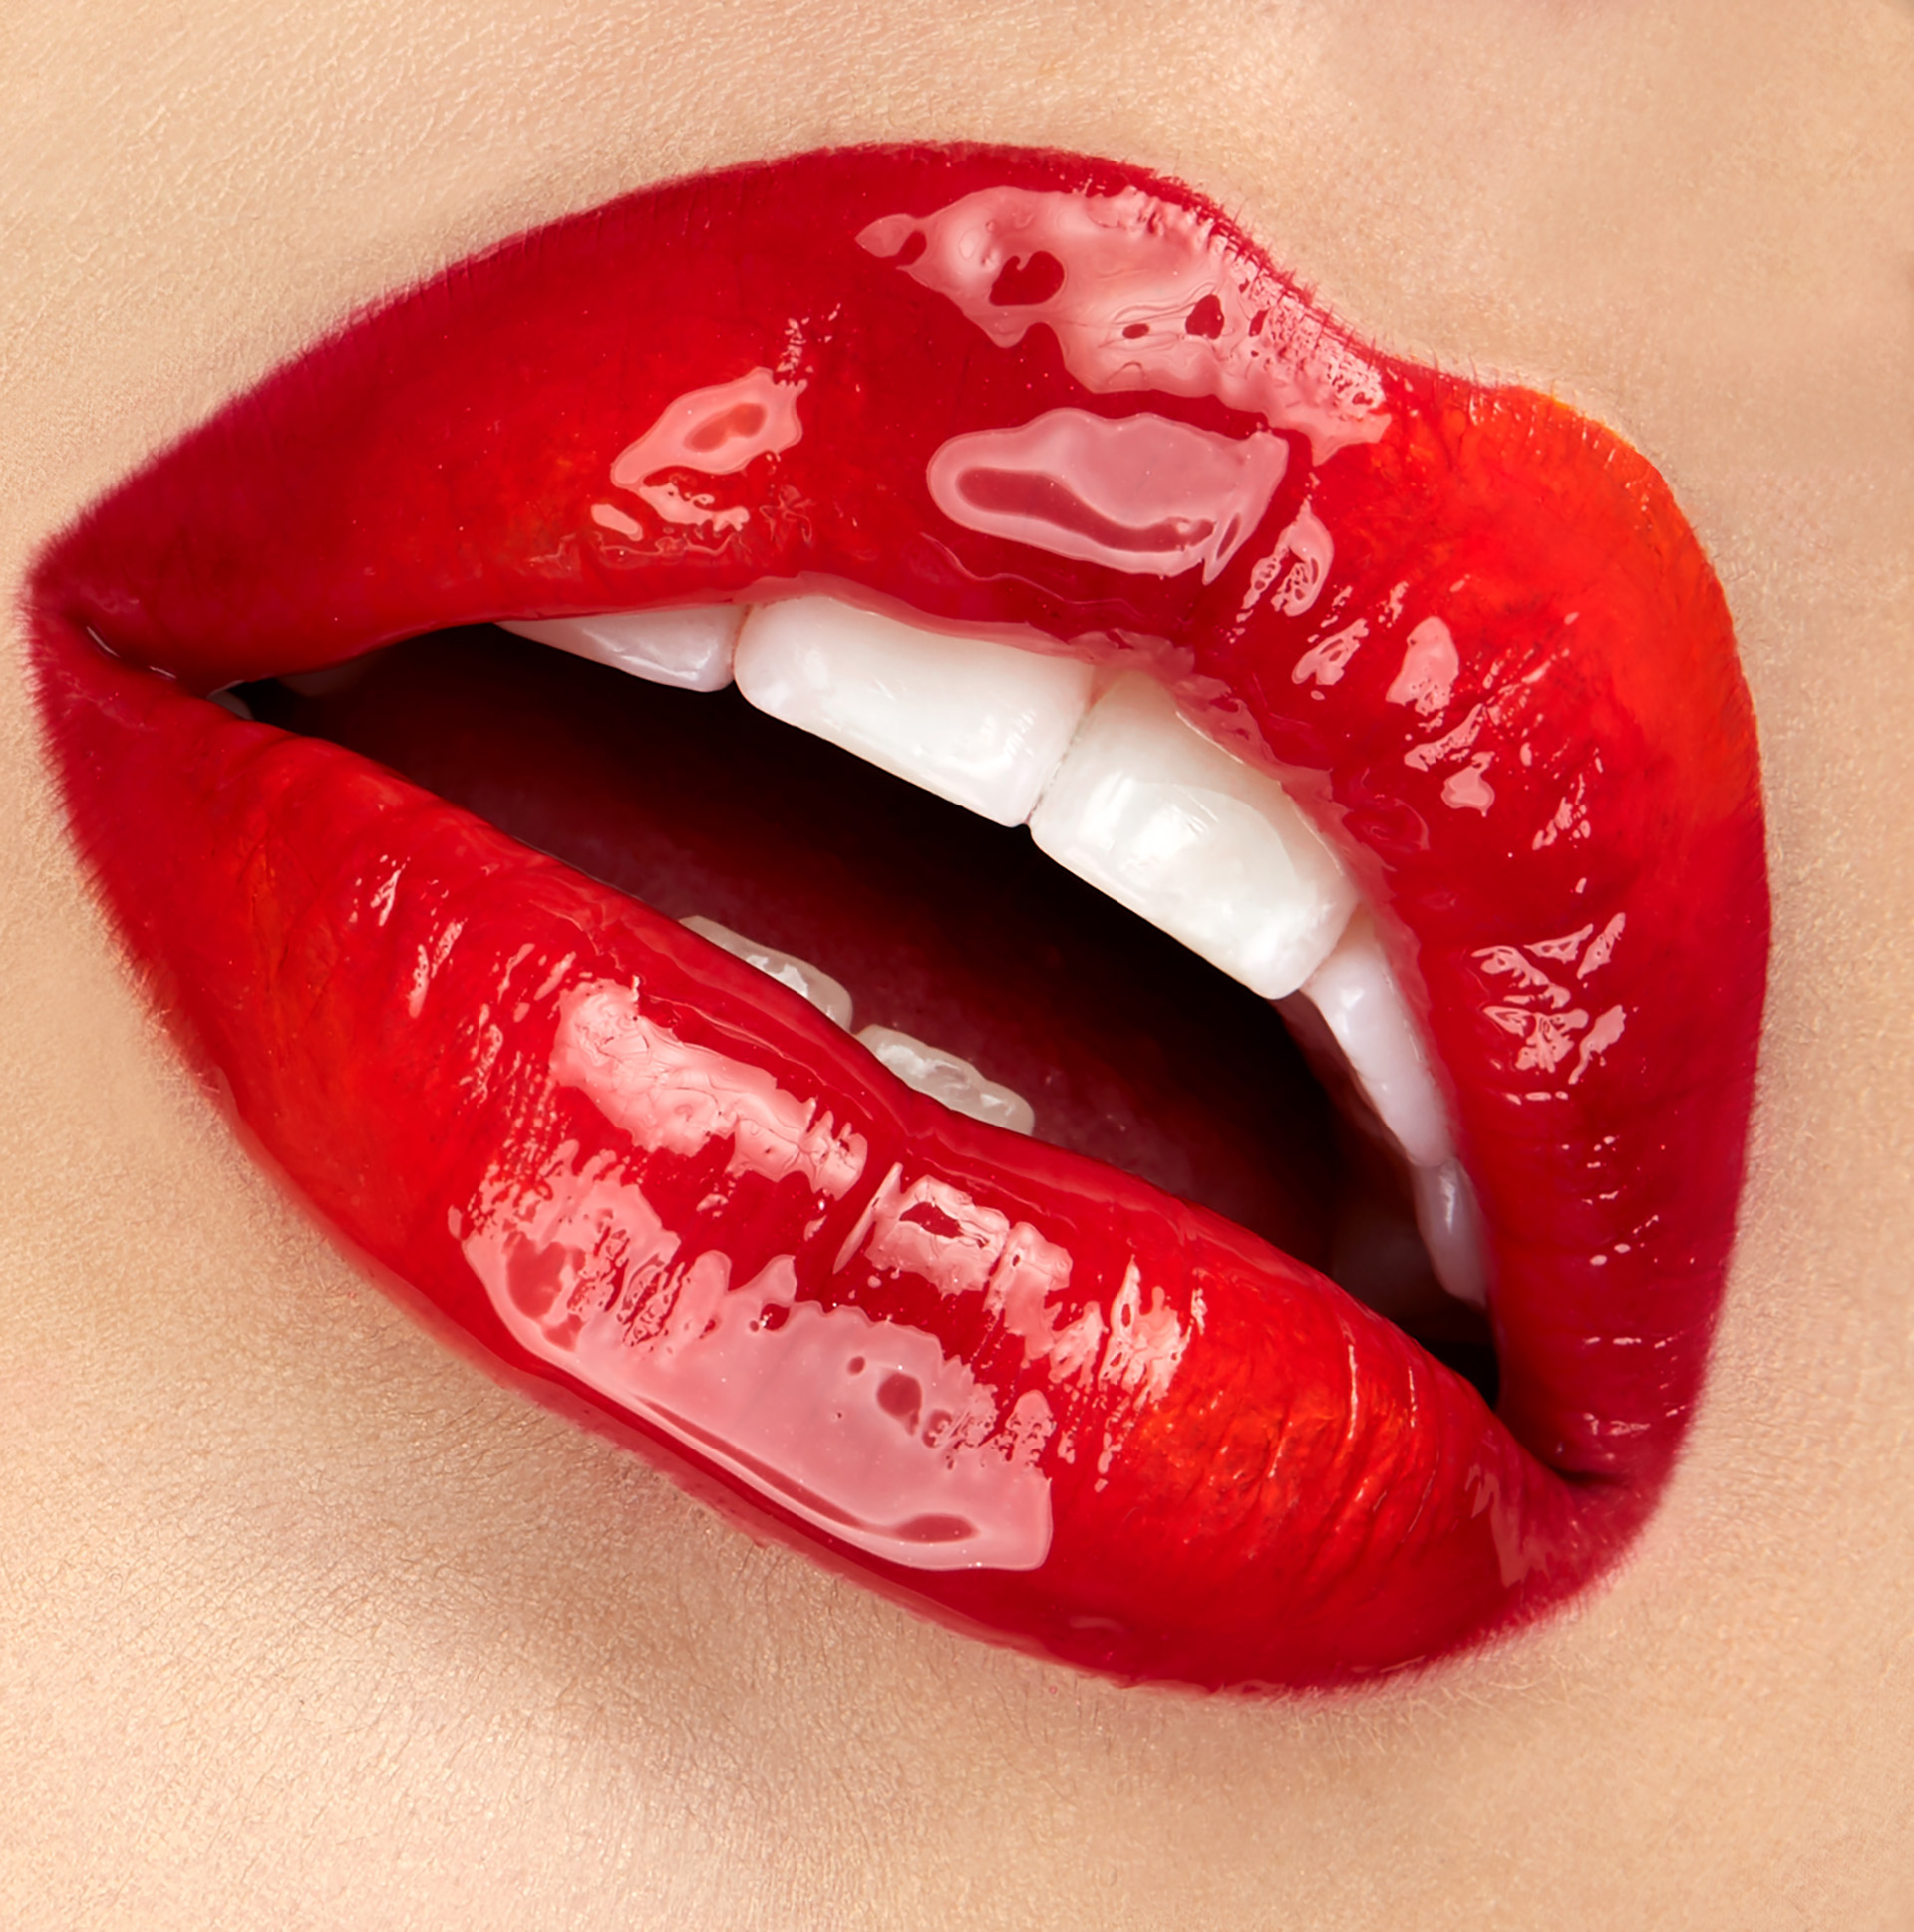
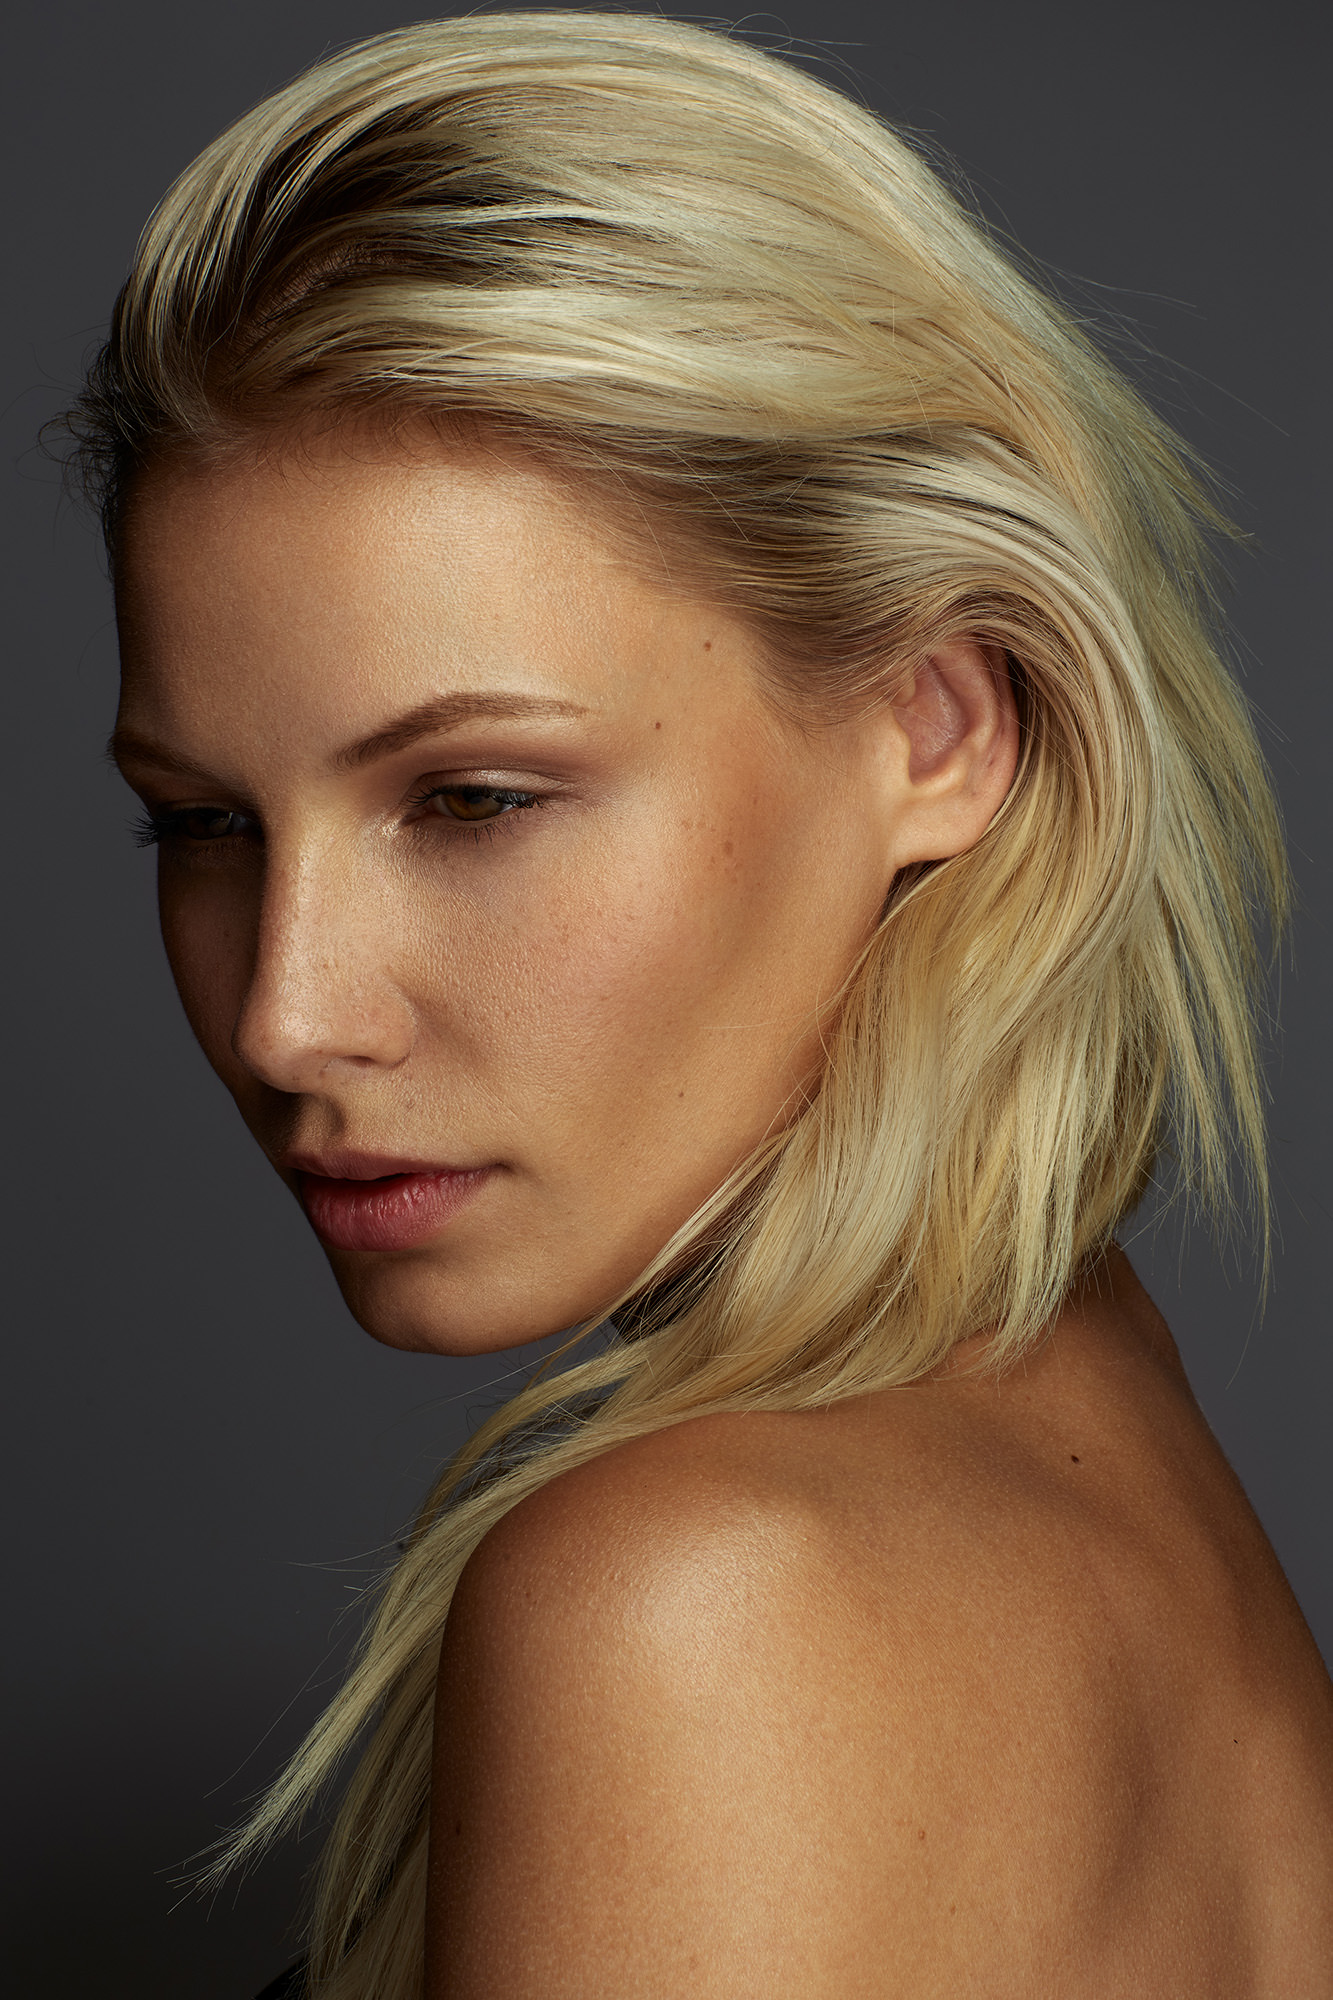
Macro beauty photography is extremely inspiring because you can showcase stunning elements that sometimes go unnoticed to the eye. I can capture beautiful textures of makeup or glowing details on the skin to provide the viewer a closer look. You can frame close to the face, just the subject’s lips, or even a super closeup shot of part of the eye.
As one of the largest manufacturers of photographs, we offer a variety of best lens for makeup photography designs. solaroid energy focuses on providing you with the most stylish and extravagant image that you will ever see on the web. Whether it’s a camera, a camera accessory, or a camera repair, solaroid energy experts search the globe for the best and most unique models. Our collection of unique photographs includes best camera for beauty photography, best affordable camera for makeup pictures and best lens for beauty photography.
With the best designs, values, and styles, we provide the best nikon lens for beauty photography. For photographs, there are many different designs available. solaroid energy official website is the best place to shop for best phone for makeup pictures. Among the most popular photos on the market are ours. You can find macro photography makeup on our website. You can choose from a variety of best beauty photography designs available right now. Select your favorite now!
Macro beauty photography — a type of macro photography — allows me to get creative and show a unique perspective on the face, but it certainly comes with its challenges. In this article I’d like to share my favorite tips on macro beauty photography including lens choice, angles, and depth-of-field. I specialize in beauty photography and have shot dozens of campaigns for skincare brands, eyelash companies, foundations lines and much more. Now I want to pass that expertise on to you and let you know the special considerations to watch out for. Let’s dive in!
Best lens for makeup photography
1. Be aware of very narrow depth of field
Aperture:
With macro photography you are working with extremely narrow depths of field… sometimes even millimeters!
Some photographers love shooting wide at F/2.8 but that is going to be extremely difficult with macro photography. The depth of field may be so narrow that nothing appears in sharp focus.
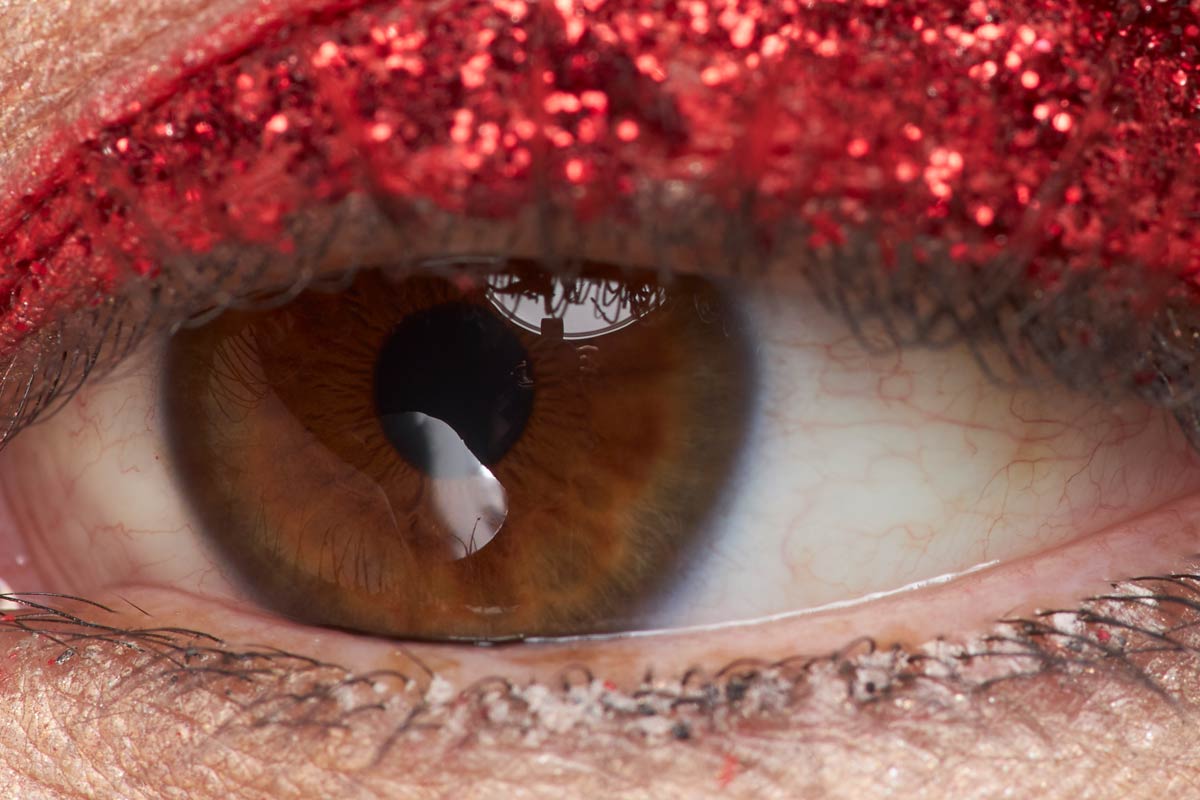
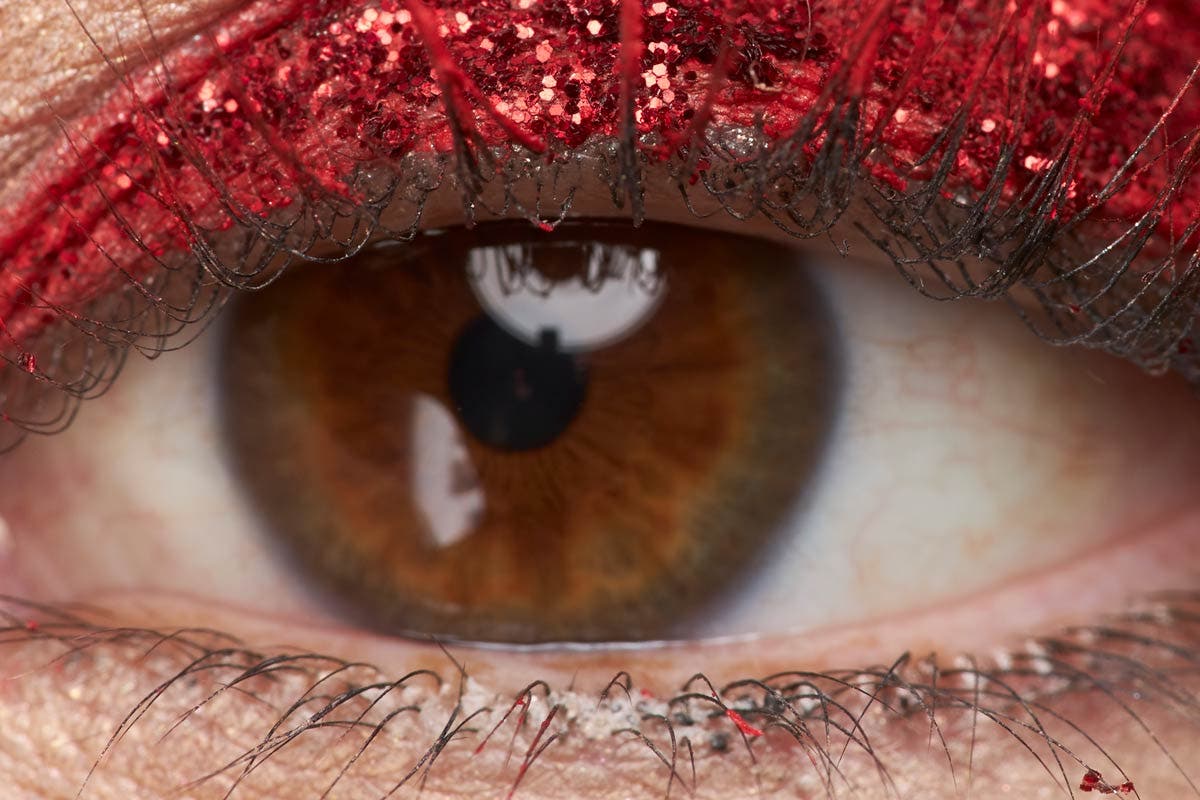
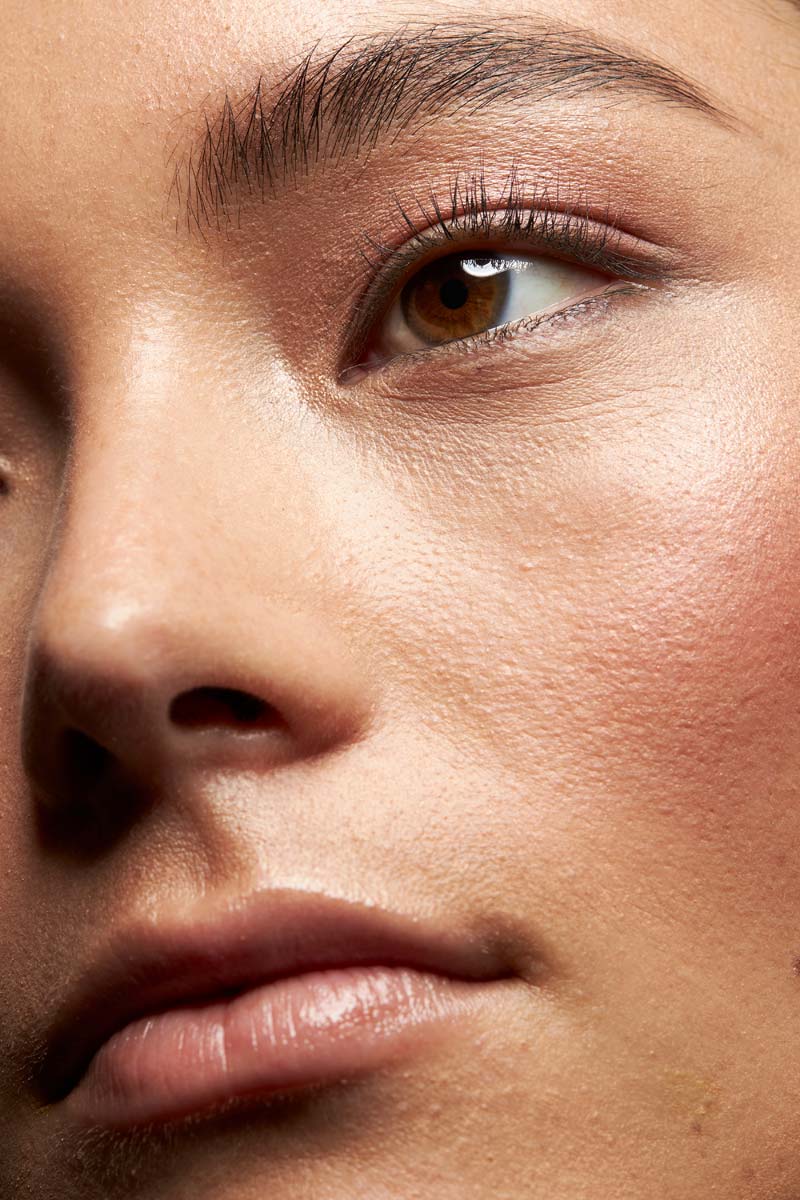
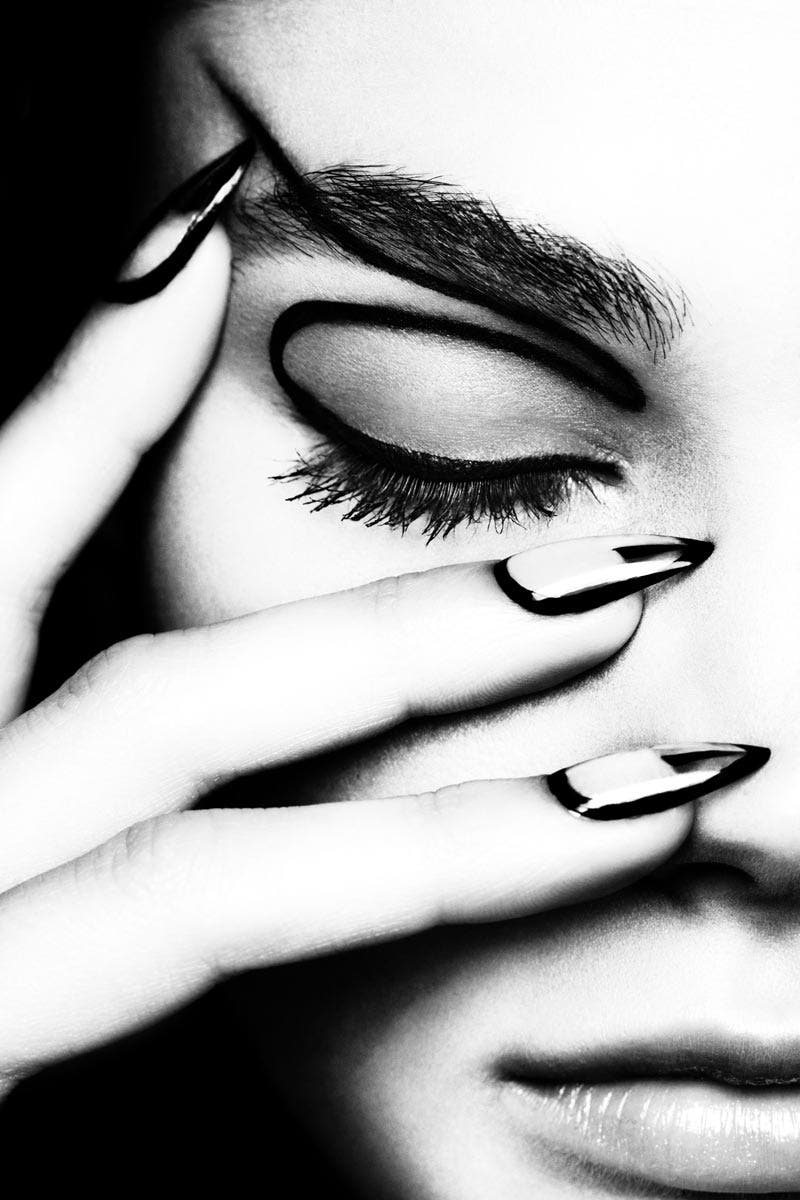
Compare these two super closeup shots. Both are shot with the exact same lens, aperture (F/8) and same distance from camera. Notice that when I focus on the pupil, the eyelashes are out of focus. When I focus on the eyelashes, the pupil is out of focus. Even at F/8 I am working with a tiny depth of field.
Typically F/2.8 is going to provide you with a lot of focusing challenges, and instead I recommend F/11 as a starting place to give you a bit of flexibility. From there you can certainly go wider but that will be a good place to begin.
If you don’t know much about depth of field, there are a few apps and websites that allow you to input different criteria and determine the actual depth of focus you are working with.
Your aperture, focal length, and distance to subject all affect depth of field. The longer your focal length, the narrower your depth of field. The wider your aperture, the narrower your depth of field. The closer you are to your subject, the narrower depth of field.
In macro photography, you are often working with a longer focal length (100mm, 180mm) and very close to your subject, meaning you already have a minimal depth of field to work with. Try to plug in the variables here to see how it affects the results. They may surprise you! For example, if I am working with a 100mm macro lens at one foot away from the subject (common with macro lenses) at F/2.8, my depth of field is only .04 inches. Tiny!
Distance to subject:
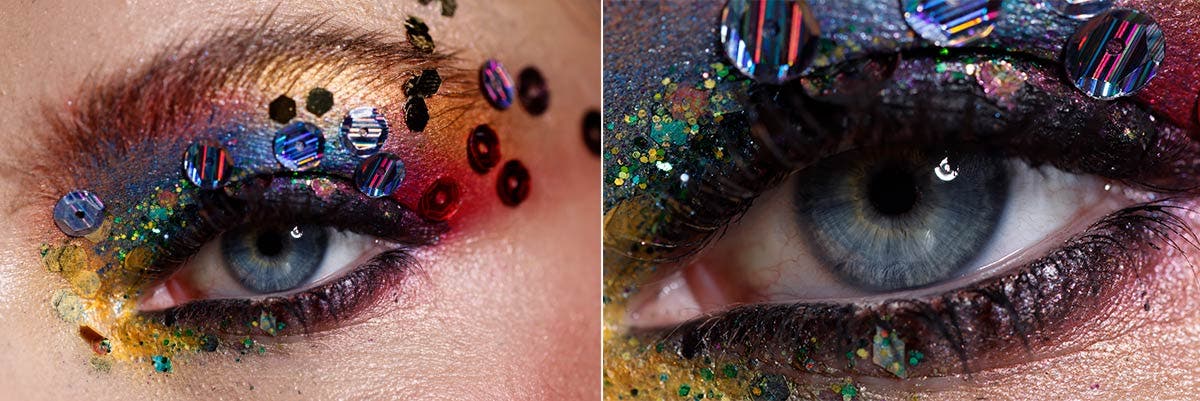
Another option to increase functional depth of field is to back away from your subject even just a tiny bit for a slightly wider composition and then crop tighter in post. It’s a balance, you get more depth of field, but of course you are wasting pixels if you have to crop drastically in post-processing, so do this sparingly. That’s why the Canon EOS R5 is such a great choice when shooting macro. Those 45 megapixels give you flexibility to crop in later (check out my hands-on review of the camera here).
In the past I’ve been hired to shoot eyelash campaigns where I needed the eye and the eyelashes completely in focus. Even at F/16, I needed to back up a bit and crop in to have everything completely sharp.
Let’s take a look at this in practice. In the first image above, I filled the frame with the eye in camera with my initial crop. Notice when we zoom in to take a closer look, the eyelashes are out of focus.
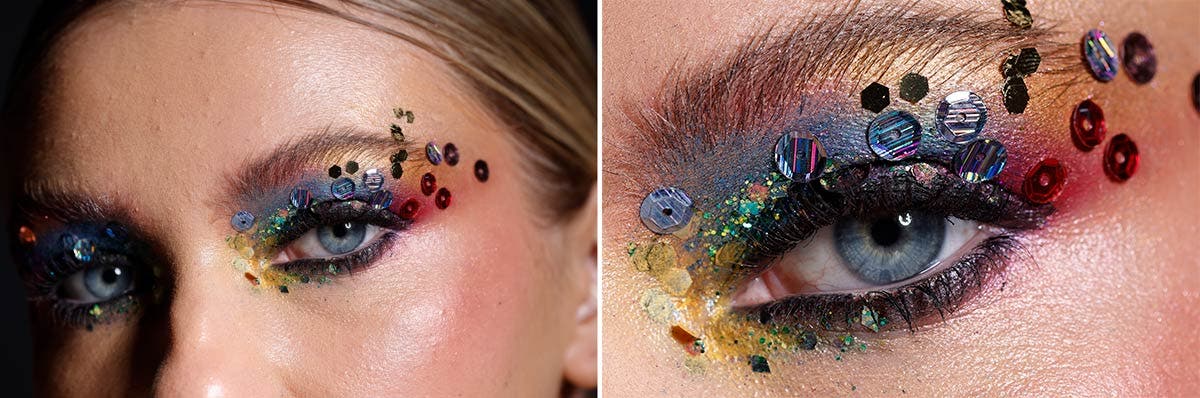
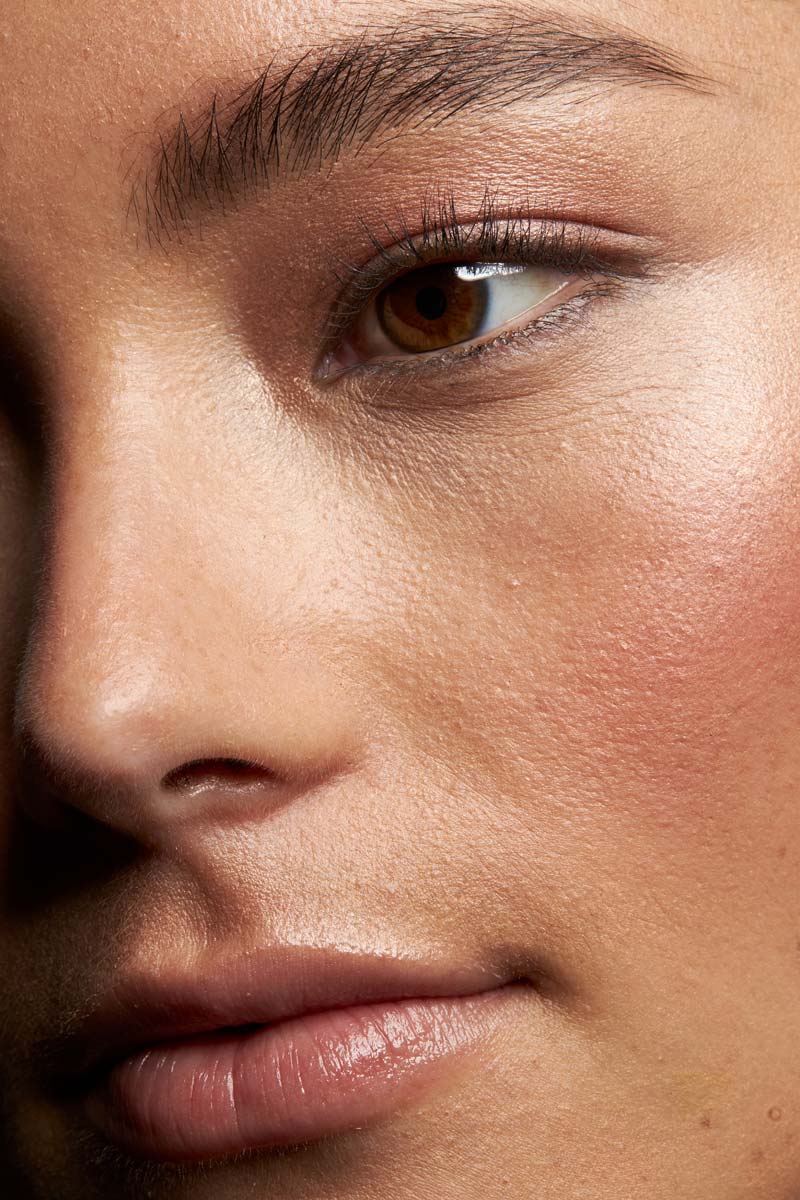
Let’s take another example where I shoot the same image, same depth of field and same lens. The only difference is that I shoot a looser composition the second image above. When we crop into the eye now we can see that the eye and the eyelashes are now in focus. Backing up a bit, away from our subject, effectively creates more depth of field. Please be wary of wasting too many megapixels and information.
Plane of focus:
Our next consideration is working with our plane of focus. Basically, envision that there is this imaginary plane that is parallel to your camera’s sensor. Wherever you focus is your plane of focus, and it is only as deep as your depth of field. In other words, whatever is the same distance from the camera and on the plane of focus is what will be sharp.
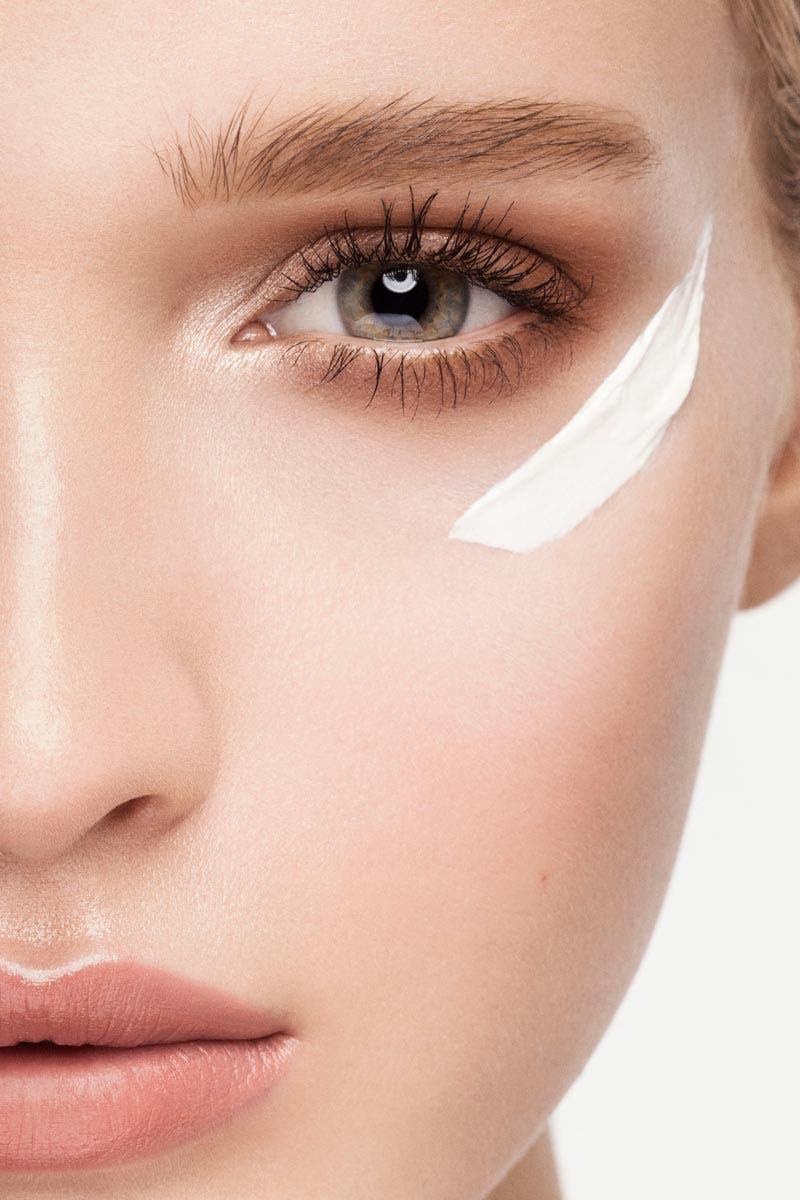
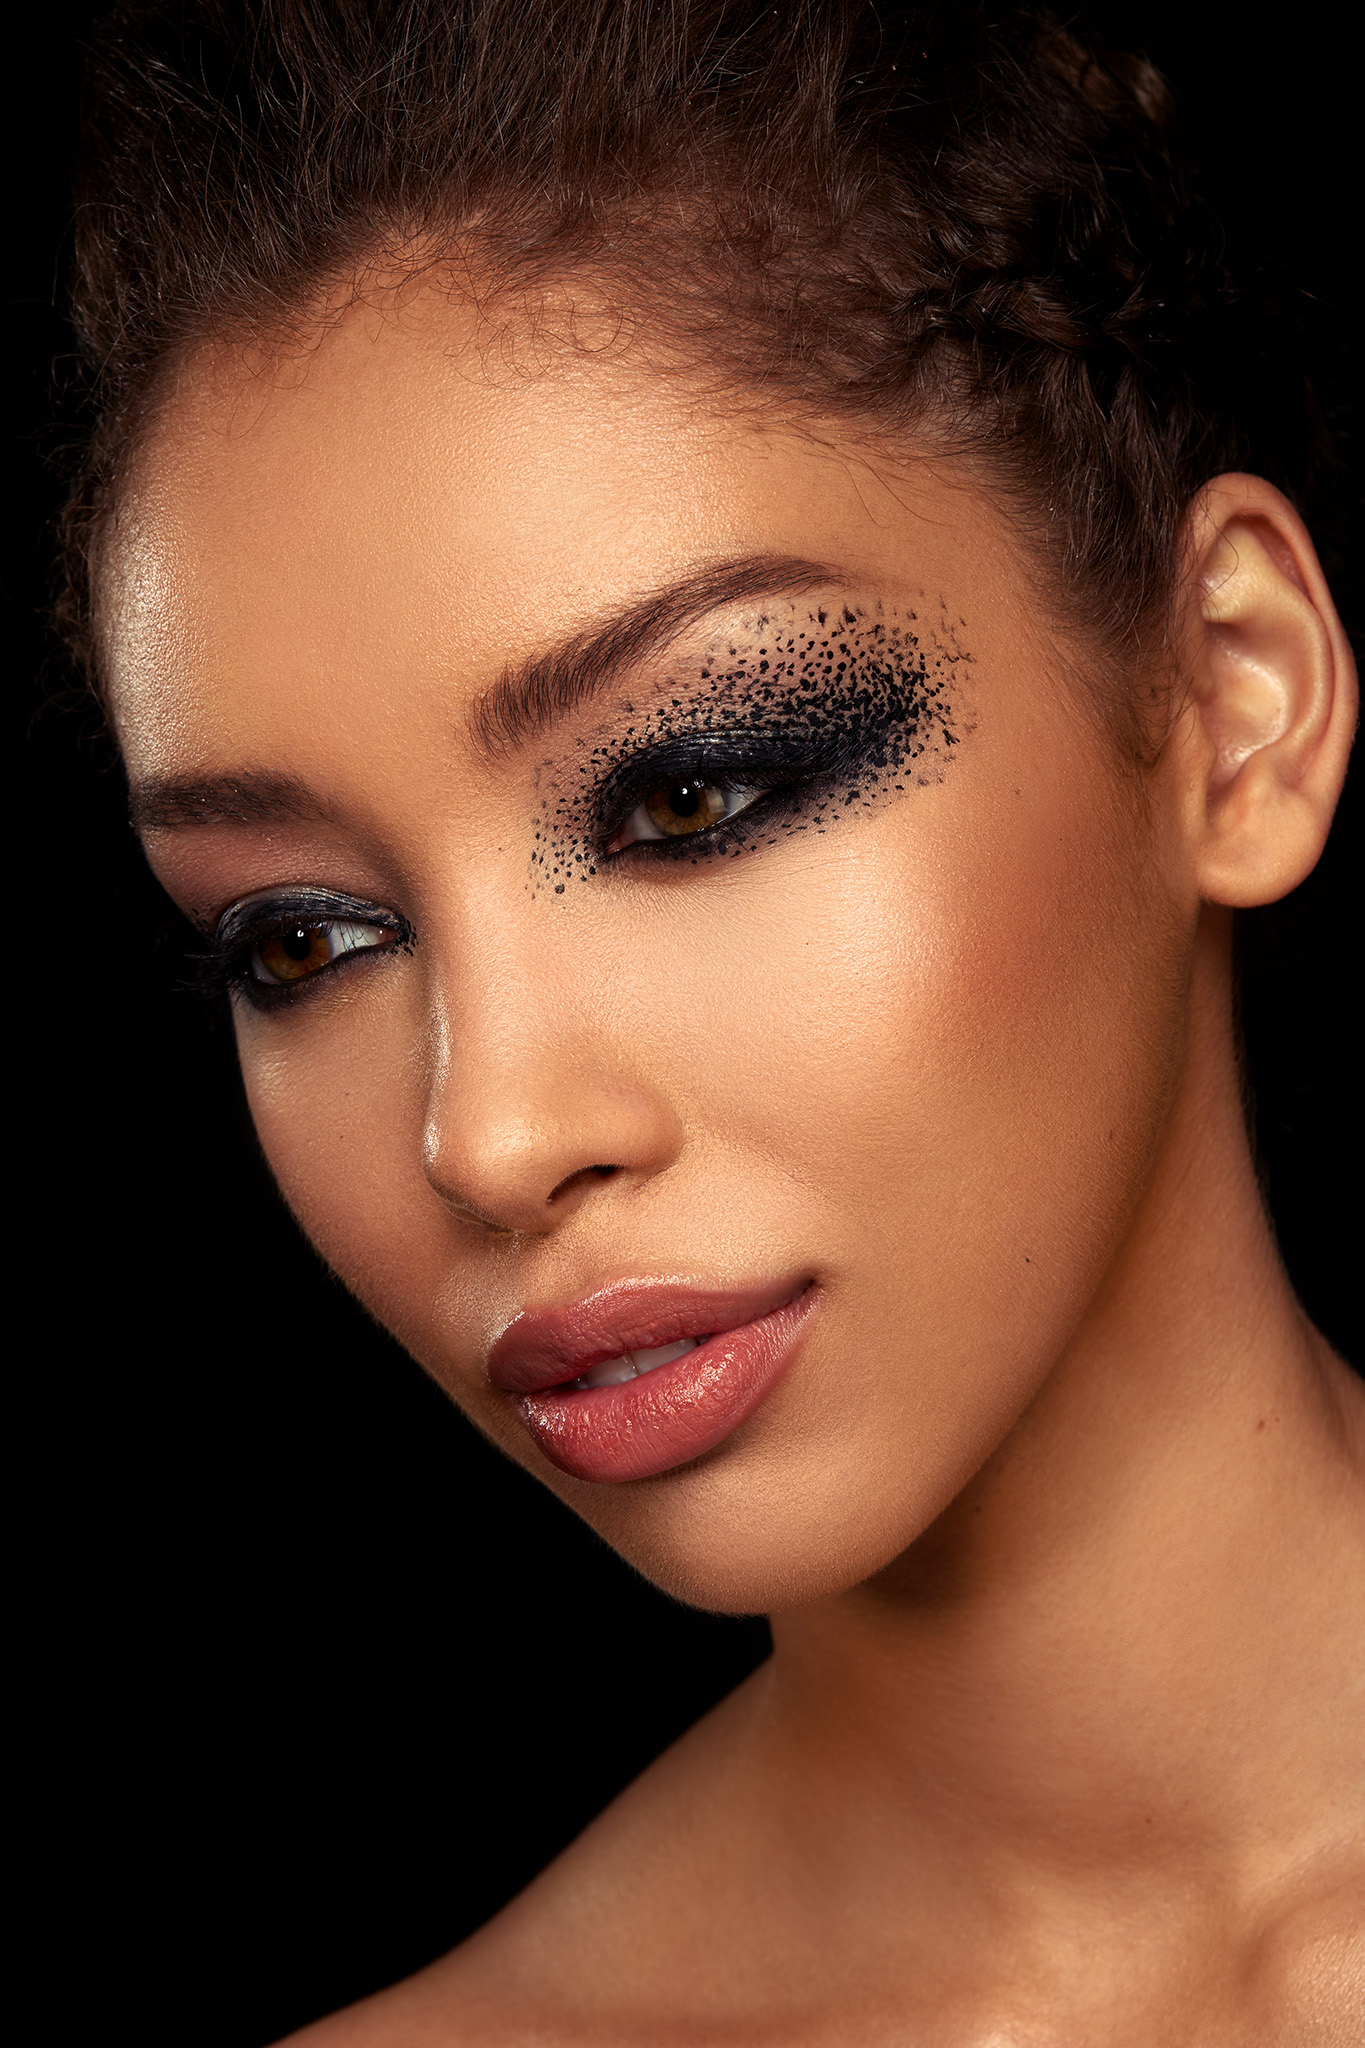
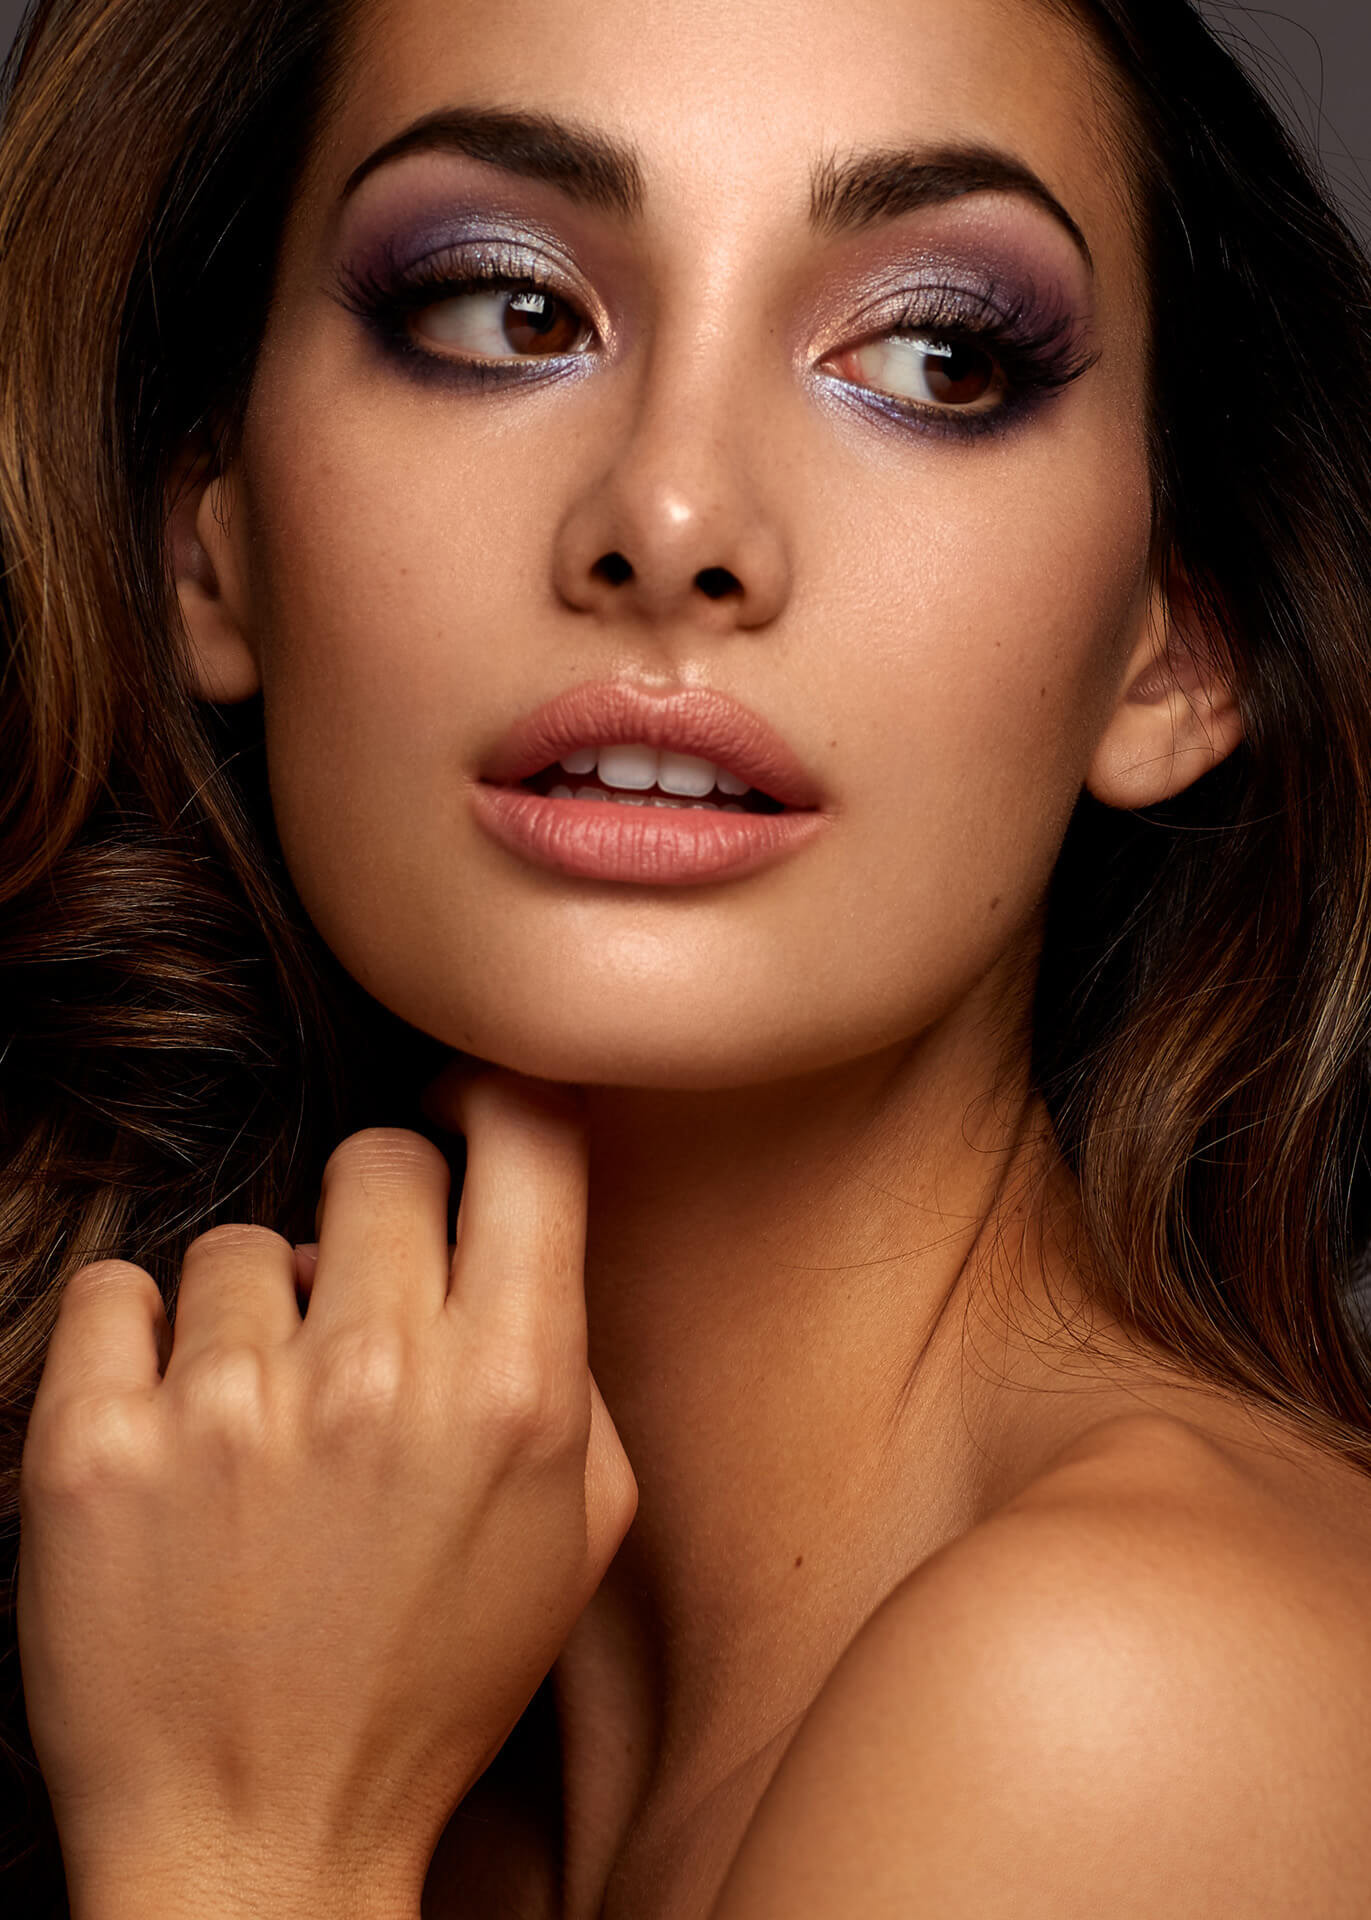
Here’s a straightforward example. In the shot above, I am tight on my subject shooting around F/4. Even though I am shooting at F/4, notice how the left eye is out of focus. The subject’s head is turned very slightly so that the eyes are not on the same focal plane (the left eye is further from the camera) and therefore it is slightly out of focus. You certainly do not always need both eyes to be in focus, but in this example it is very disconcerting to have one eye just barely soft (looks like an accident).
Let’s say for a particular shot you need to have both the eyes and the lips in focus. You’ll need to be sure that one is not much closer to the camera than the other. If the subject is tilting their head too much or your camera is too high or low, this may actually make it difficult to achieve focus on both elements in focus.
In these images I am shooting at F/11 to give myself a greater depth of field. In the first shot I am shooting at a lower camera angle with the lips closer to the camera. I can only choose one element (the lips or the eyes) to be in focus. I chose the eyes to be in focus because the slight softness of the lips is not distracting.
Next, I raise my camera angles slightly so that the eyes and lips are equidistant from the camera (on the same plane). Notice how both of the elements are now sharp.
Play around with the camera angle and subject’s pose to try to get both elements on your plane of focus (equidistant from camera). The narrower your depth of field, the harder this will become to achieve.
2. Selecting focal length
Telephoto Vs Macro:
Let’s start by talking a bit about the differences between a macro lens and a telephoto lens. For a lot of beauty photography, using something like a 70-200mm lens is going to be a great choice. It’s versatile and you can get a nice tight headshot. With the Canon EOS R5, I have the ability to crop in to showcase some beautiful details because this camera captures 45 megapixels.
Even though it is technically a shorter focal length (180 vs 200mm), it allows me to focus much closer and even magnify my subject. I can move in so that I can capture just the eye at life size or even a portion of the eye in the frame without cropping. The detail is incredible.
So, typically if I am doing a headshot, I’ll grab the 70-200 but if I need just a shot of the eye or lips or half of the face, I’m straight to a macro lens.
Most camera and lens manufacturers have several focal lengths to choose from in their line of macro lenses, and the one you choose makes a big difference in two ways; your compression and working distance.
Compression:
As you probably know, if you take a 35mm lens and try to shoot a tight portrait, it distorts the face in an unflattering way. Typically you end up selecting a portrait lens with a slightly longer focal length like an 85mm because of the more pleasing compression. Now, imagine you can take a 35mm macro lens, get insanely close to your subject (like macro close) and take an image. The distortion will be even more exaggerated. When selecting a focal length for a macro lens, the same ideas of compression apply. A longer focal length will have more compression than a shorter one. I personally recommend selecting 100mm or longer to achieve pleasing close-up results.
Working distance:
Choosing a longer focal length gives you more working distance between you and your subject. Let’s take two very popular macro lenses: the Canon 100mm macro and the Canon 180mm macro. To fill the frame with the subject’s eye (and nothing else in the frame), I have to be very close to my subject. When I am filling the frame with the 100mm macro lens, I am mere inches away from my subject whereas with the same composition with a 180mm macro lens, I have a more comfortable distance between my subject and the lens.
Many wedding photographers prefer a 100mm macro lens because it is sharper and it is also easy to back up and achieve a full headshot. They can quickly move between a closeup on a wedding ring to a portrait of the bride with a few steps. With super closeup beauty shots of the eyes or lips, I usually prefer a longer 180mm macro lens because I can give my subject more breathing space and I don’t have to worry about obstructing my strobes.
3. Have a concept and a team
This final tip is not technical or gear-related, but conceptual! If you are going to take a macro beauty shot, do so for a reason. What are we looking at? The freshness of the skin? The rich texture of makeup? A feature on a product? Whatever reason you are shooting macro, be sure that the light, makeup, and composition reinforce your concept. When you don’t know the concept of the image, that’s when you can suffer from far too much going on in your shot or far too little. There is no right or wrong with beauty lighting. It’s what fits your concept.
So far I haven’t mentioned your creative team. This is one of the most important elements of the entire shot. Spend time testing and finding makeup artists with the talent to flatter your subject and to help you achieve your concept. When you get up close, “bad makeup” is going to be extremely noticeable. There is no way to hide it. Your creative team will become indispensable.
Summary
As you can see, there are several things to think about when trying your hand at macro beauty photography. It will take practice and most people find it challenging when they first give it a try. But, as with anything, give yourself time to practice and perfect it. If you’d like to learn about beauty lighting and techniques, check out my Beauty Lighting Recipe Guide. Stay tuned for more on this topic!
Getting Started In Beauty Photography | Why, How, & What Gear

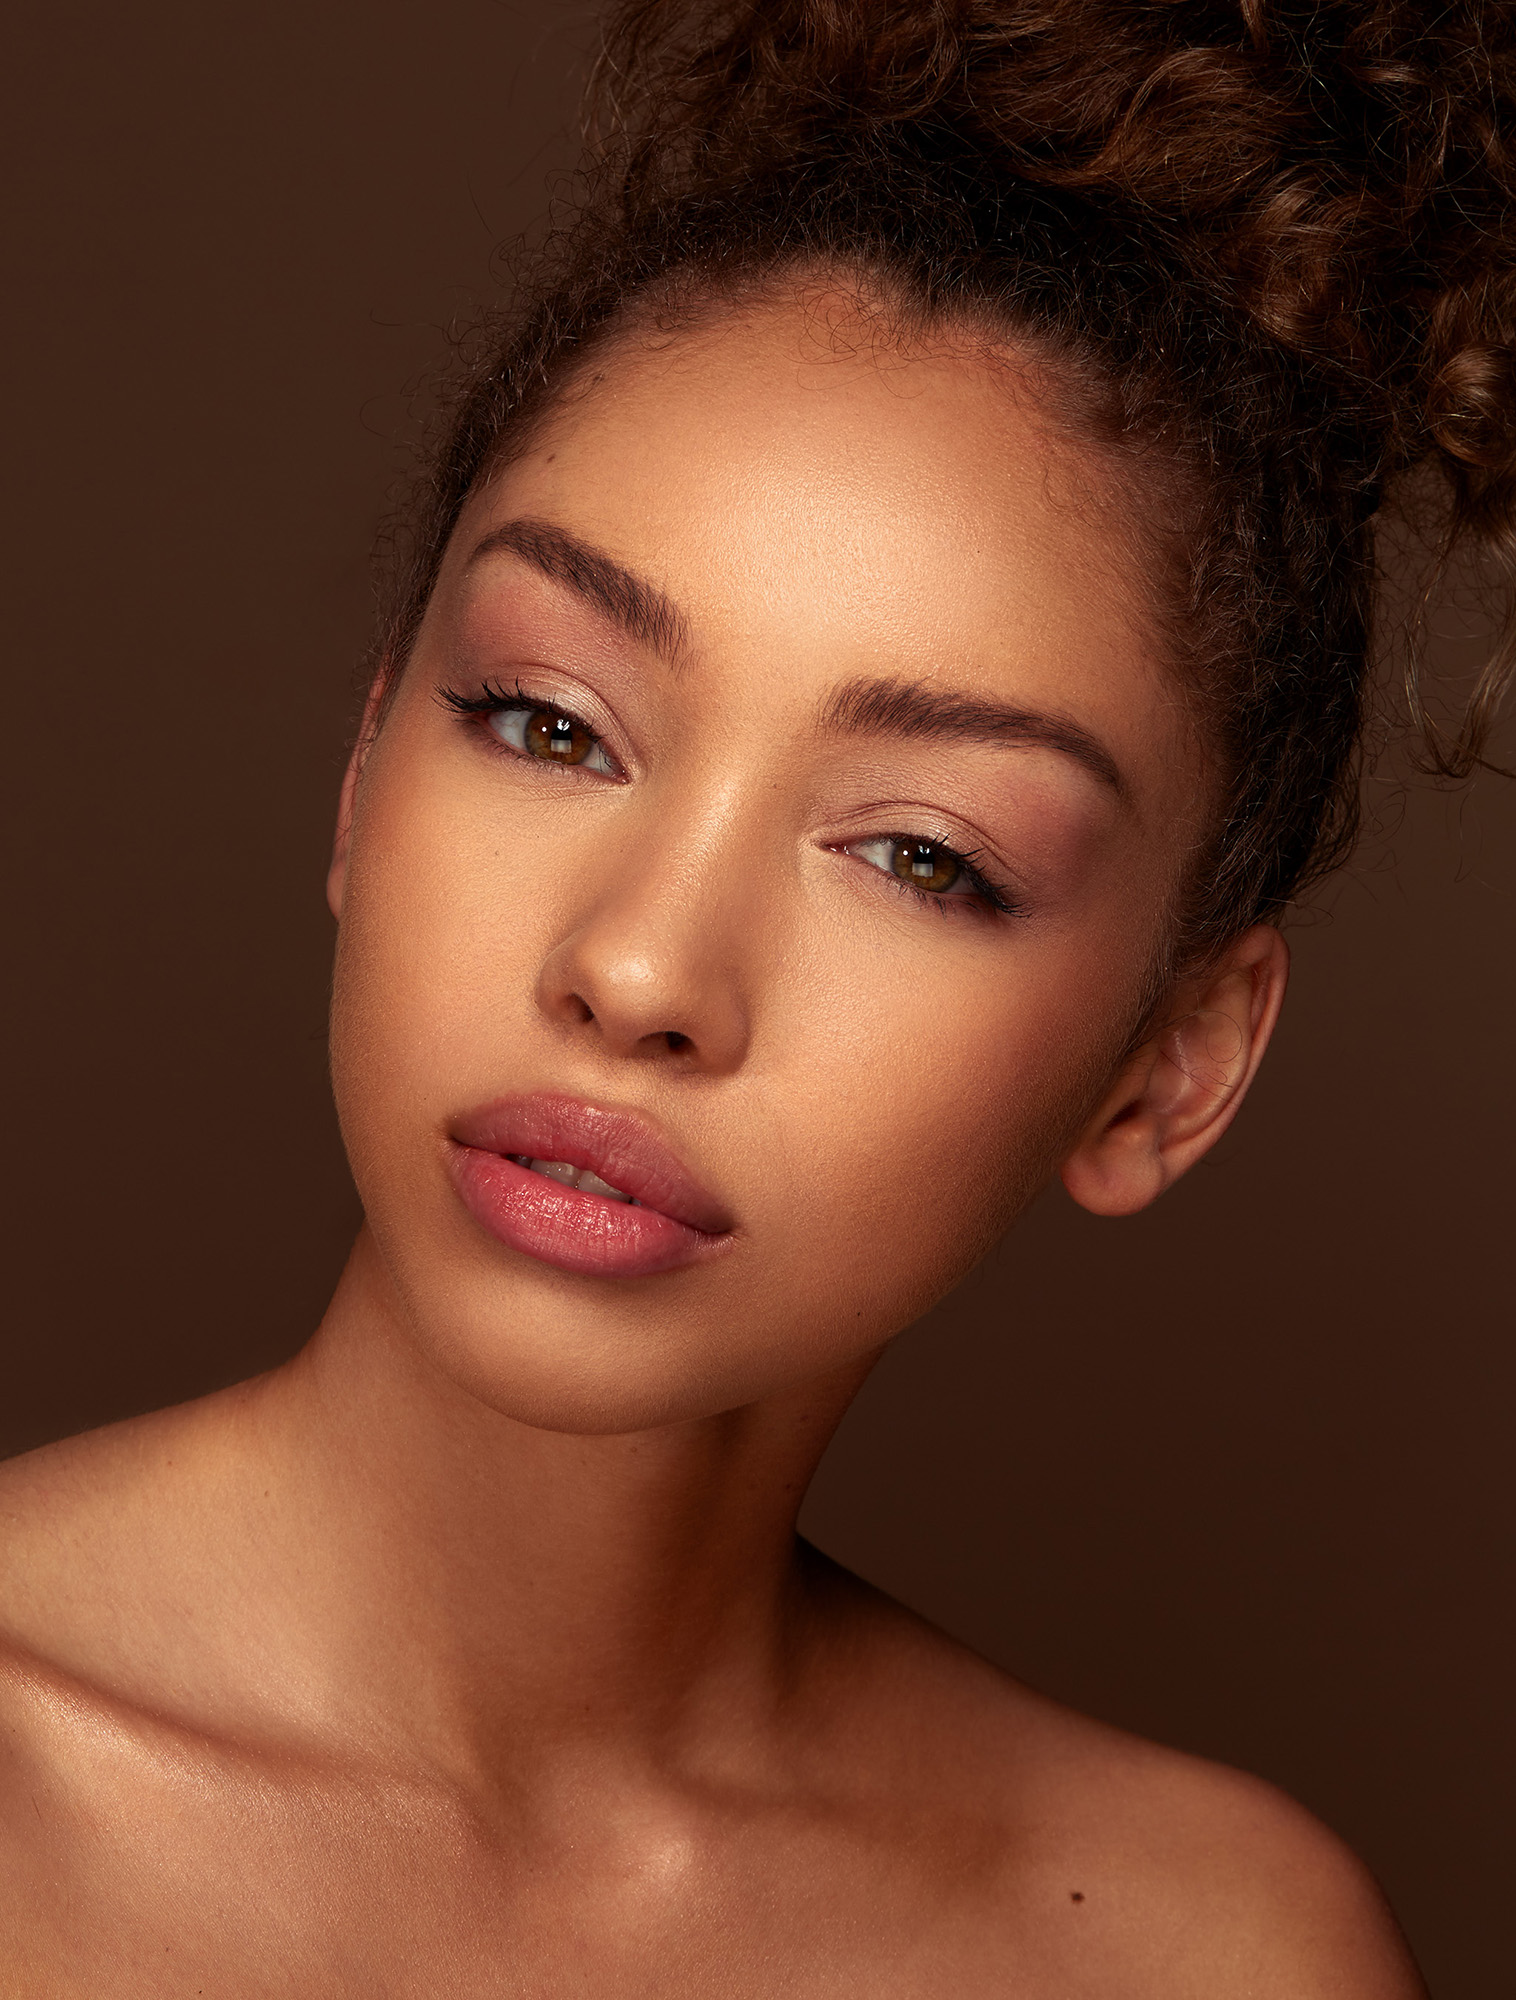
Beauty photography can seem a bit complicated on the surface, but it’s not nearly as difficult as people sometimes make it. With a hyper focus on skin and makeup, beauty photography provides a platform for a photographer to show their skills in lighting as well as in retouching. Afterall, lighting is most important when it’s focused on a macro level. With over 100 different beauty shoots in the last year, I’ve been able to use it as a way to highlight my skills in lighting and retouching, while creating images that help complement my portfolio.
A critical reason why I started shooting beauty, was the collaborative effort. Shooting beauty photography has gotten me in touch with more creative makeup artists, hair stylists, and agency models than any other type of photography, allowing me to develop contact lists and relationships for when I’m shooting the next commercial shoot that has little to nothing to do with beauty.
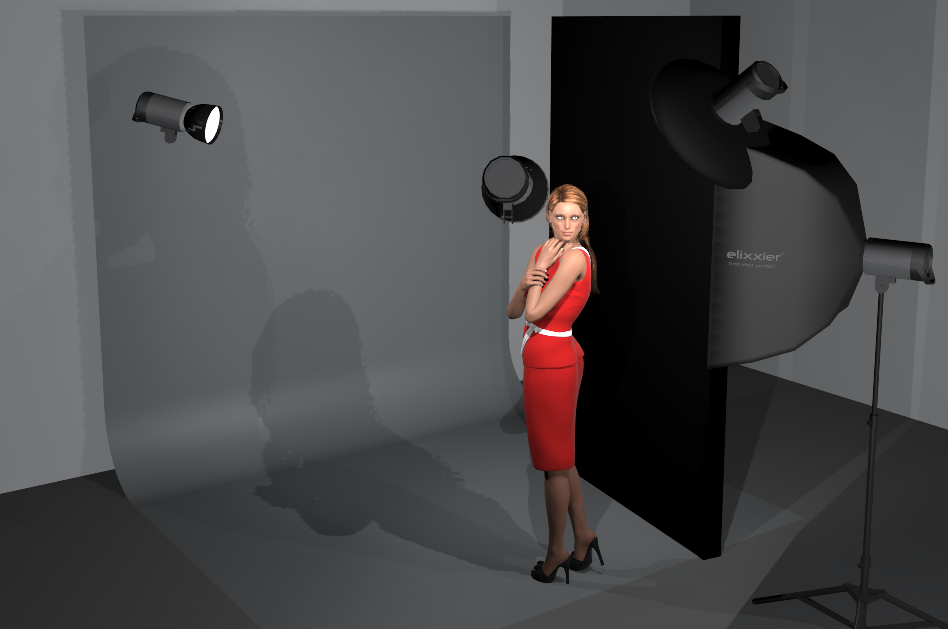
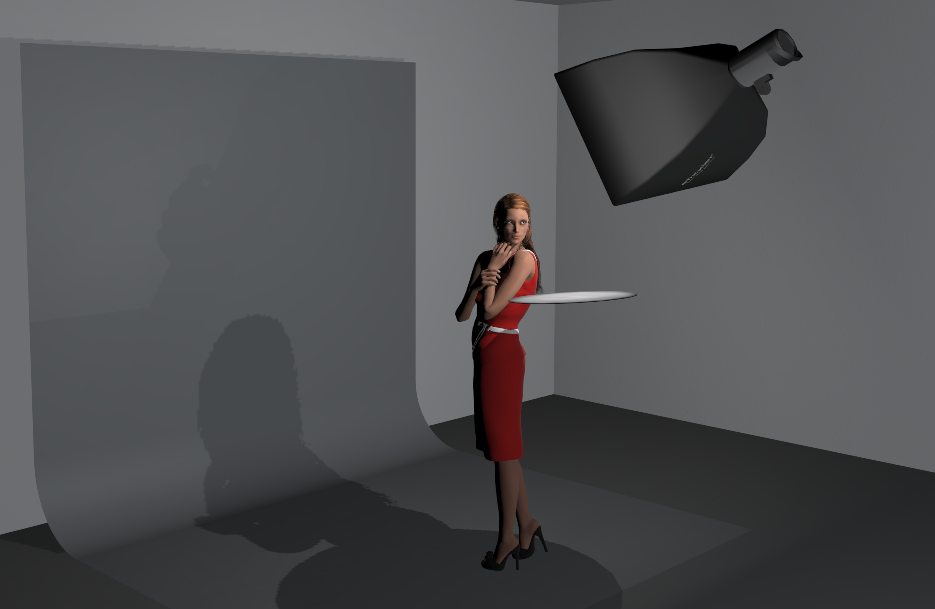
Profoto B1 in Beauty Dish above. Profoto B1 in 2’x3′ softbox camera right.
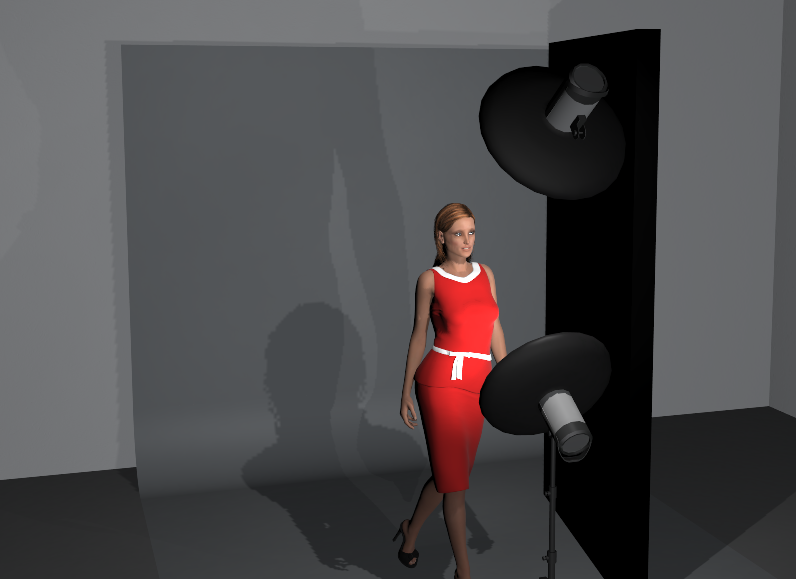
Profoto B2 in Magnum Reflector Camera Left. Profoto B2 in Zoom Reflector Behind for Rim.
I’ll also preface this by saying I don’t consider myself an expert of this craft. It wasn’t until a year or so ago when I started experimenting with beauty work. And while I’ve shot over 100 different beauty photoshoots, and had the honor of being on set for some significant ad campaigns, I still think I have plenty to learn still but did want to take an opportunity to share what I have learned, to help those along who might just be starting out.
Where Camera is King
I’m not going to get into another battle about whether or not gear matters, but know that some critical pieces of gear are crucial when shooting beauty work. Perhaps the most important and useful tool when shooting beauty, from a camera standpoint, is resolution. In beauty photography, the high-resolution cameras like the Canon 5DS, Nikon D850, and Sony a7RIII are king. Particularly when paired with a macro lens like the Sony FE 90mm f/2.8 G Macro, Nikon 105mm f/2.8G Micro, or my personal favorite, Canon 100mm f/2.8L IS, the resolution gives you incredible cropping power, allowing you to turn a full face shot into a macro shot highlighting a single detail. This is incredibly important because while you may want a macro shot highlighting lips, the modeling agencies will only have a use for it if you have something full faced as well, and it’s important to keep them happy as well.
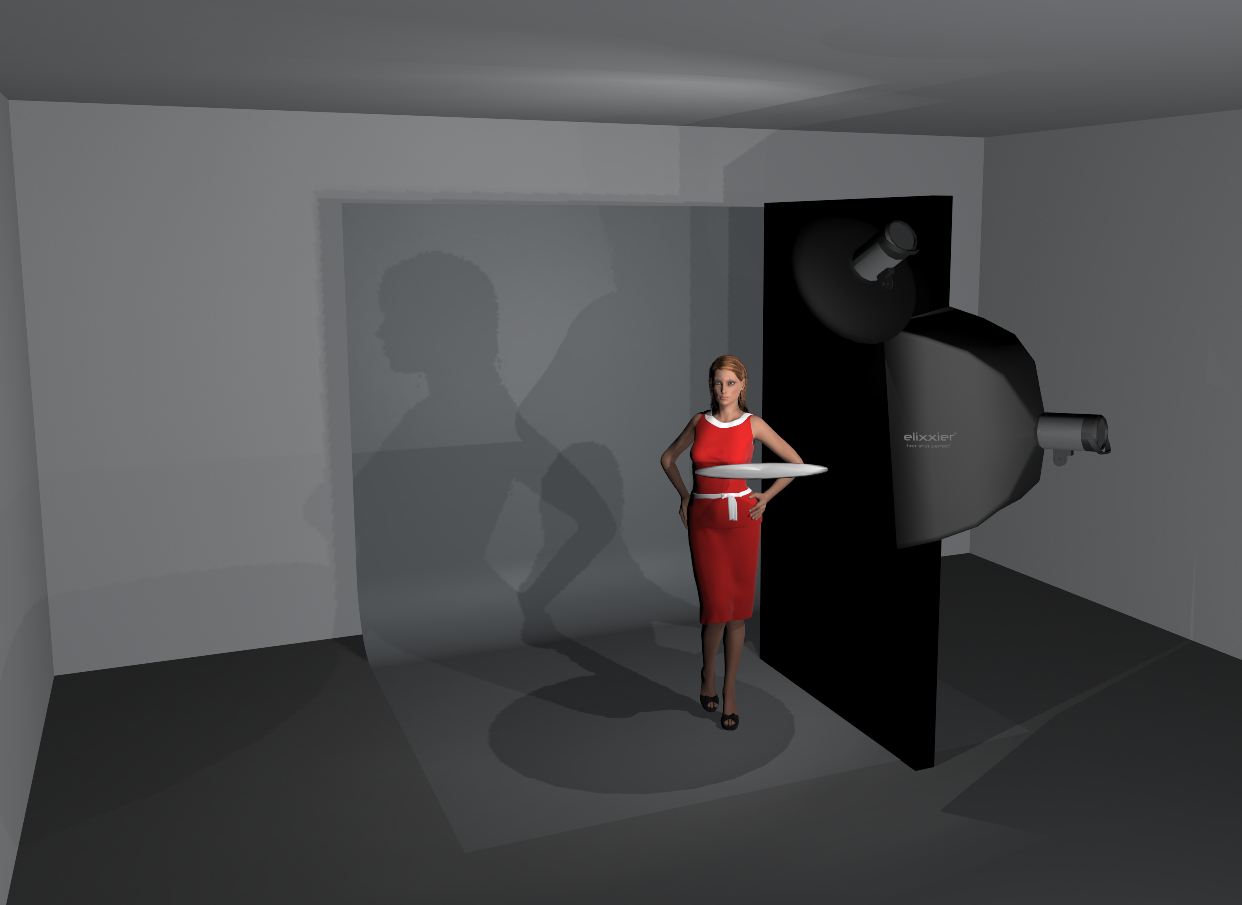
Profoto B1 w/ Beauty Dish Above. Profoto B1 w/ Beauty Dish Below. Black Flag for Light Control
As always, these suggestions come with some caveats. While resolution and a macro lens are important, they’re not a complete requirement when shooting beauty work. For the first six months of my beauty work, I was shooting with a Canon 85mm f/1.2L II and Canon 5d Mark III. The resolution of the Canon 5DS, Nikon D850 and Sony a7rIII is great, and it’ll only make the process more pleasant, but not a complete requirement. (I call this the gear discussion hyperbole, where when you say you should use a specific piece of gear, it must automatically be followed by someone saying “I can do it with less”).
Lighting Your Beauty Shoot
Lighting can be quite the challenge when shooting beauty work, but it’s quite easy if you stop and think about what your goals are. For me personally, I have three set goals when lighting a beauty shoot. With all portrait work, I want to make sure some light is in the eyes reflecting back into the camera, as otherwise you risk getting the ‘dead eye’ look. The second goal I have when lighting beauty work, is that I want some dimension in the lighting, creating gradients of lighting throughout the skin. These gradients of lighting will give your images a three-dimensional effect, and can easily be achieved by positioning your lighting at various angles and understanding your lighting ratios. The final rule for beauty lighting is to use lighting that is flattering to your subject; after all, this is beauty photography, right?
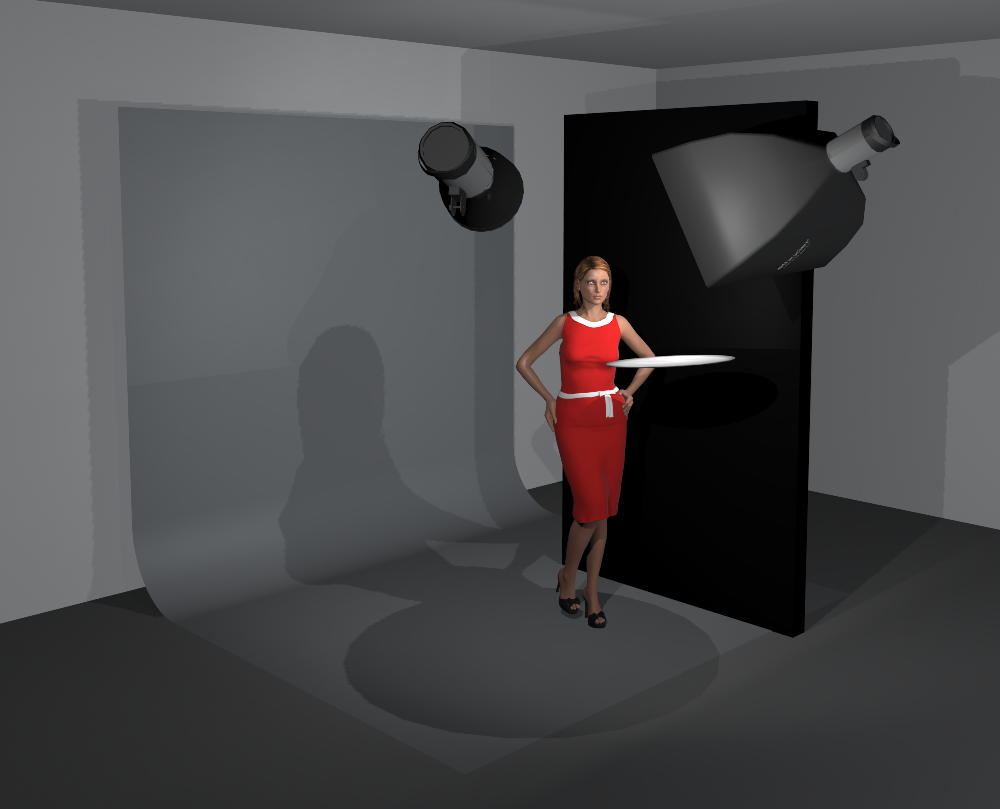
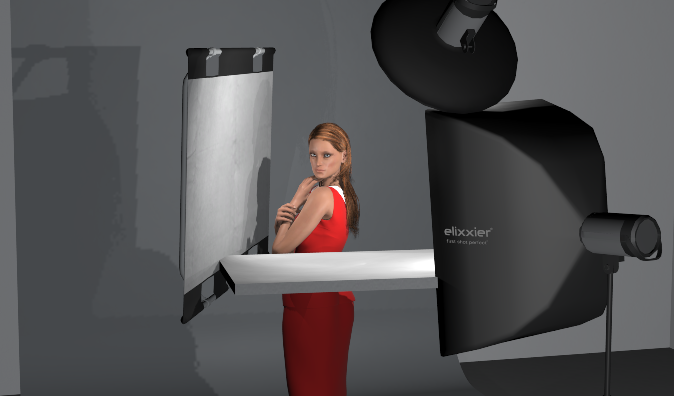
Profoto B1 w/ White Beauty Dish Above. Profoto B1 Camera Left w/ 2’x3′ Softbox.
Bounce from Below, Black Flag on the Right & Left
Adding Dimension to your Lighting
The first principle is easy, make sure you have a catchlight in the eyes, but how does one create dimension with their lighting? Well, I do it by using flags, in the same way I use lights, to create shadows instead of highlights. To use flags, all you need to know is an elementary understanding of lighting – dark colors absorbs light, light colors reflect light. This is the reason why Canon and Sony’s zoom lenses are painted white, which helps reflect light, and can be a big difference maker when shooting in the Sahara Desert for days at a time.
Profoto B1 Above in 2’x3′ Softbox. Profoto B1 Camera Left w/ Magnum Reflector.
White Bounce from Below. Black Flag Camera right
Using black flags can help control your highlights and shadows, giving you more dimension in your images. And this added dimension can be cheap. For example, most of my black flags are nothing more than a black posterboard purchased at a craft store for a couple of dollars.
But flags aren’t the only way to add dimension to your lighting. The same principles can be done by using grids, or by positioning your light at angles, and use feathering techniques to have better light control.
Finding Flattering Light
The third lighting principle I use for beauty photography is to find a flattering light for your subject. This can be done with a few observations before the shoot. For starters, I almost always broad light my beauty subjects, as it creates a softer, more elegant, light when compared to short lighting, which produces more drama. Secondly, have an understanding of the concept board, as well as the skin texture of your subject. For example, if we’re going for a glossy look, you’ll generally use smaller light modifers, as they will produce harder light and more contrast. If the subject has larger skin pores, a larger light source will help minimize the skin texture and give a softer, more elegant look. Having an understanding of your concepts, subject, and lighting principles will provide you with a better understanding when it comes to execution.
Profoto B1 w/ 2’x3′ Softbox Above. White Reflector Below.
Standard Butterfly Lighting
For this reason, clamshell/butterfly lighting is usually regarded as ‘Beauty Lighting’, as it’s a flattering light for a broad range of subjects. Clamshell/Butterfly lighting is done by having your main light overhead, aimed down at your model, and a second light source from below (usually a reflector) to help diminish shadows created by the nose and other features on the face. Looking through images, you’ll see this lighting technique is used for the majority of beauty photography, though some of the best work comes through experimenting.
Camera Settings
Without a doubt, when it comes to beauty photography, finding the correct camera settings is among the easier tasks. Because you’re (likely) shooting in a studio, you have the advantage of consistency in your lighting, and the advantages of that really show when choosing your camera settings. Because beauty photography is about the details, I generally recommend shooting with an aperture set between f8-f16, so that your details are in focus. And because you’re trying to create a clean image, ISO is usually set to it’s lowest setting, with your shutter speed set to its maximum sync speed (Usually 1/160th or 1/200th). However, as always, there are no rules when it comes to being creative, so find settings that best match your aesthetic, as these are only starting guidelines.
Workflow and Retouching
Now that you have a better understanding of the technicals, you’ll want to build a strong workflow and plan for retouching. When it comes to workflow, I highly recommend tethering, as it gives the hair stylist and makeup artist the ability to see the shots as they’re taken and make any adjustments as needed. A couple of weeks ago, I put together a short guide to get you started on tethering, which should help you get a better understanding of how it works and why you should consider it. As for retouching, I won’t go too far into that, as it’s an artform in its own right, but check out some guides put together by our friends over at Retouching Academy that help you get started on building the proper workflow for retouching.
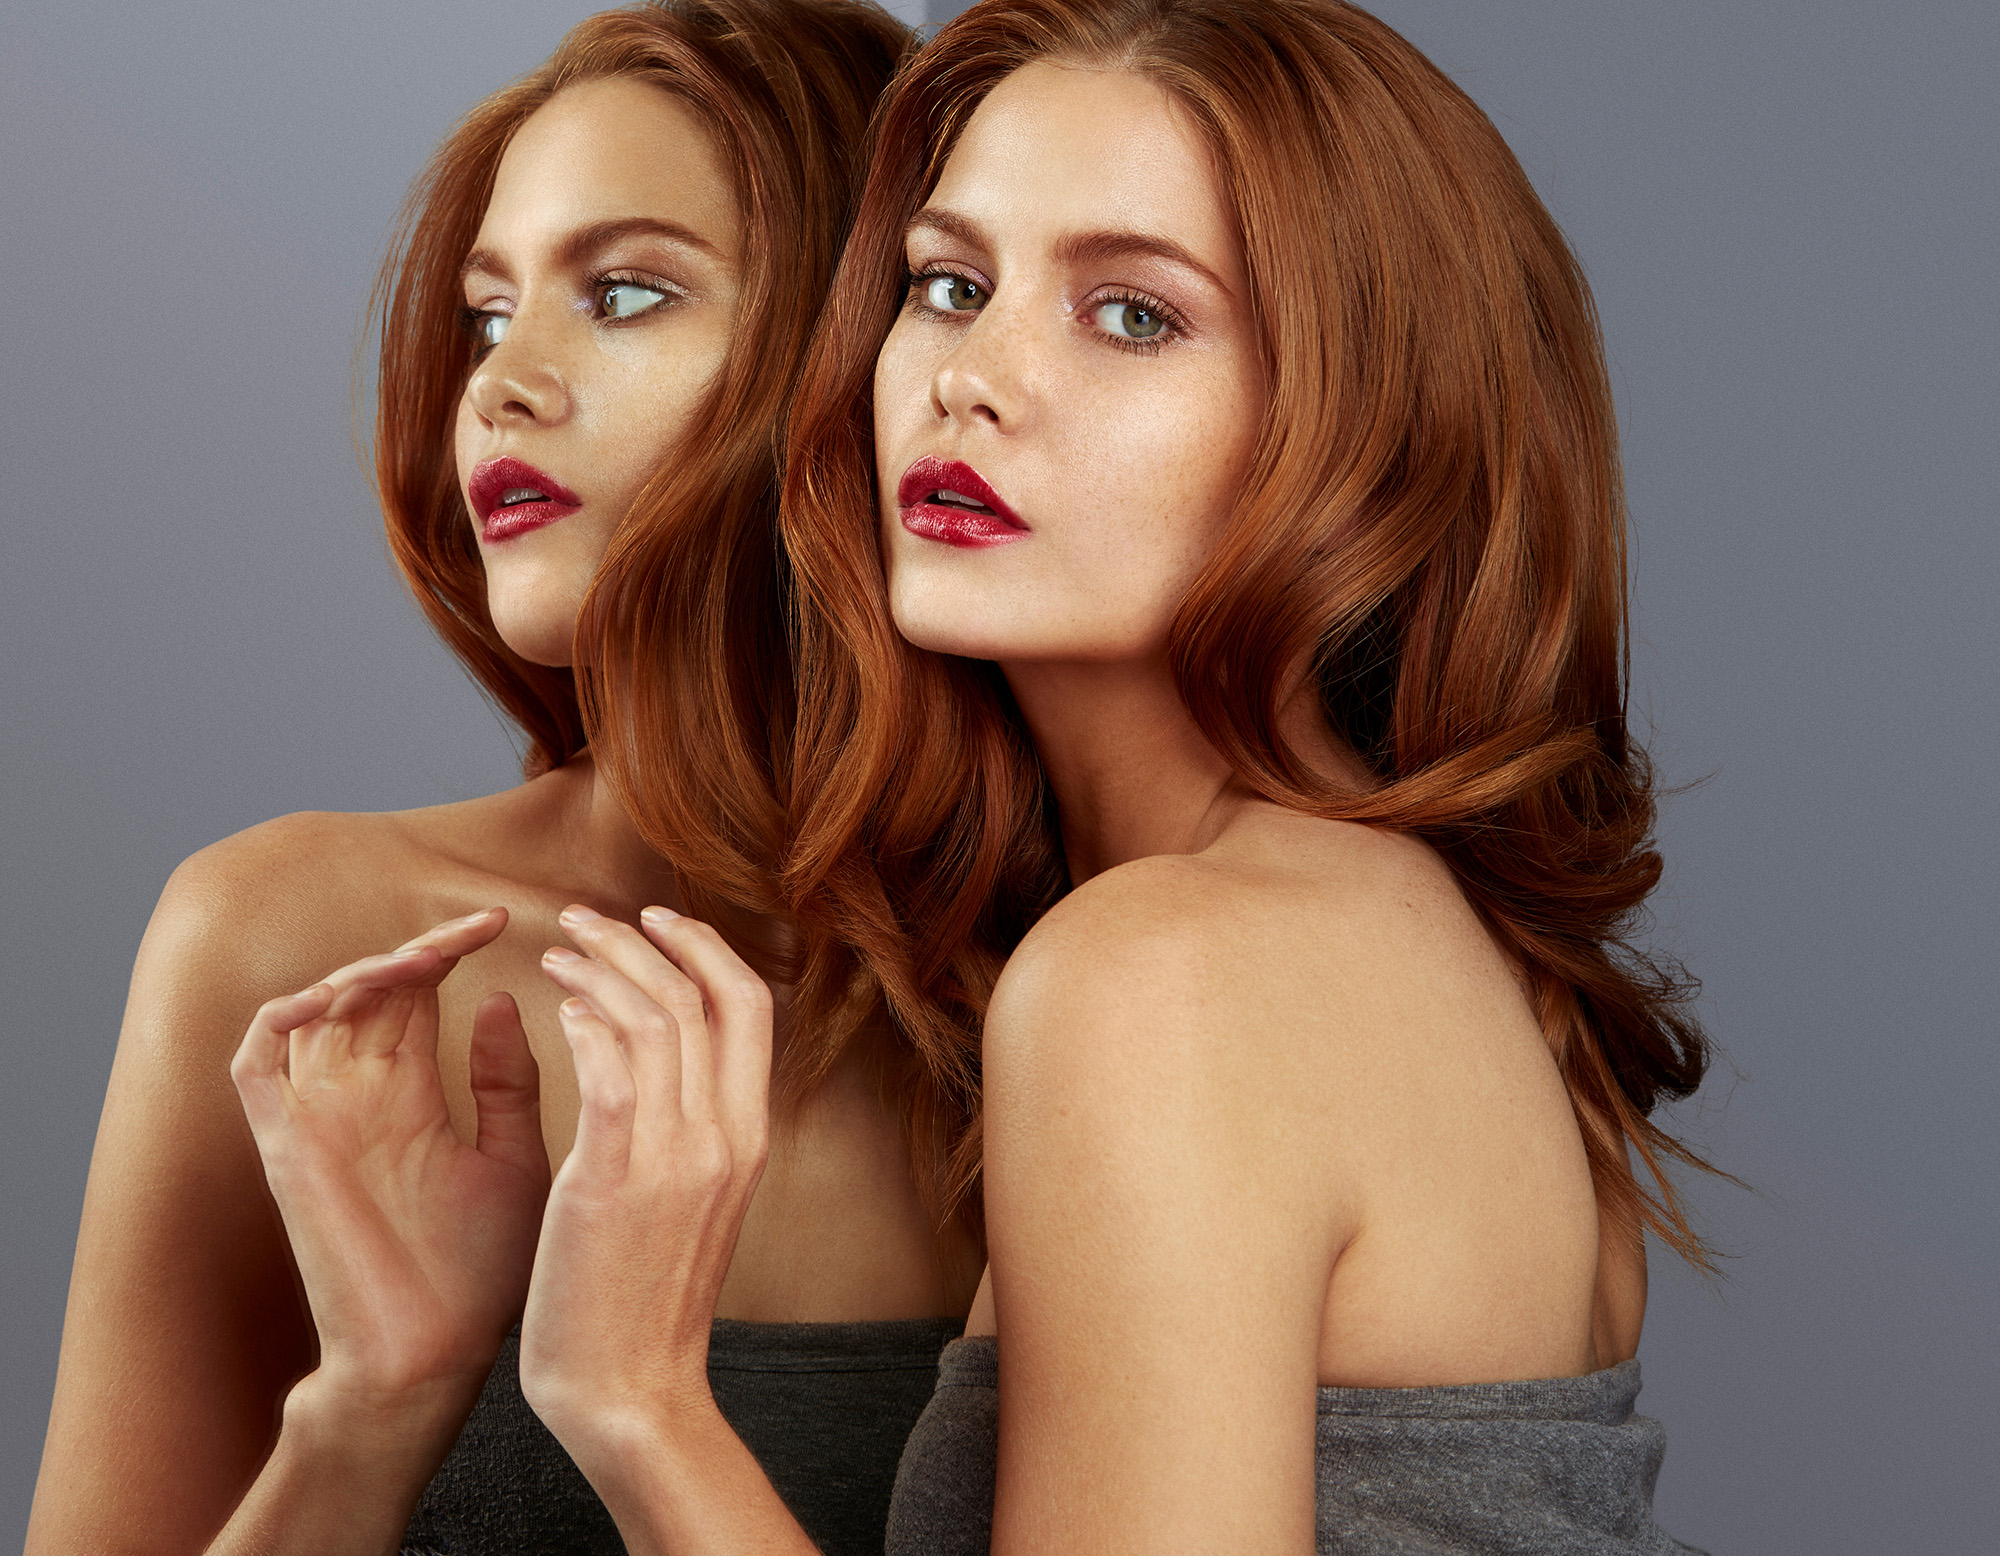
Profoto B1 in Beauty Dish above. Profoto B1 in 2’x3′ softbox camera right.
Reflector from below. Mirror Camera Left
Finding your Team
The final topic I want to touch on is perhaps one of the most important. Makeup artists are very much the star of beauty photography sessions, so it’s important to find one who can match your vision and help compliment the work. When casting for a makeup artist, I usually ask to see their beauty portfolio if they have them. The techniques applied to beauty makeup are quite a bit different than what you’d find with bridal or event photography, so it’s important to find someone to match the style. And same goes for models. While a model might be great when on location, they could really struggle when shooting in the studio, where subtle expressions are key. Additionally, pay attention to features you might ignore when shooting other styles of photography. With beauty, skin tones, skin texture, and features like the eyes and lips all become far more important when you’re focusing on them for a beauty campaign.


