Find out how to choose the best lens for fashion and beauty photography featuring top models and that super cool lighting!
If you love taking photos of models, runway or beauty shots, our portrait lenses are the best choice. We have a wide range of different styles and sizes so whether you are looking for a fast lens for faster lenses, or something that focuses closely to give you stunning detail
The Canon 85mm f/1.8 lens is the best lens for runway photography. It enables users to capture professional-looking images with a wide aperture, making it easier to blur backgrounds and create shallow depth of field. Versatility and high image quality make this lens perfect for many situations – whether you are shooting portraits or creating cutouts, this lens will provide high-quality results every time.
Rave reviews from professional photographers, makeup artists and models alike make the Canon EF 50mm f/1.8 STM a must-have for your makeup bag. This prime lens effectively reduces blurring during low light and minimalizes distortion at all focal distances, making it perfect for beauty or runway photography and everyday portrait sessions that require a quick snap of your subject.
Beauty lens camera
The Canon EF 85mm f/1.2L II USM Lens is an excellent lens for many types of photography. It is the perfect choice for portraiture and available-light photography, too.
There are many lenses that photographers can choose from, but photography on a model requires a particular type of lens. A lightweight and portable option is good for carrying around during transportation, but there are other options that are better suited for the task at hand. Lenses with a wide aperture are preferred for this purpose.
Best lens for beauty photography
3 Tips for Macro Beauty Photography
TAGS: Canon, macro beauty photography, macro photography, photography tips
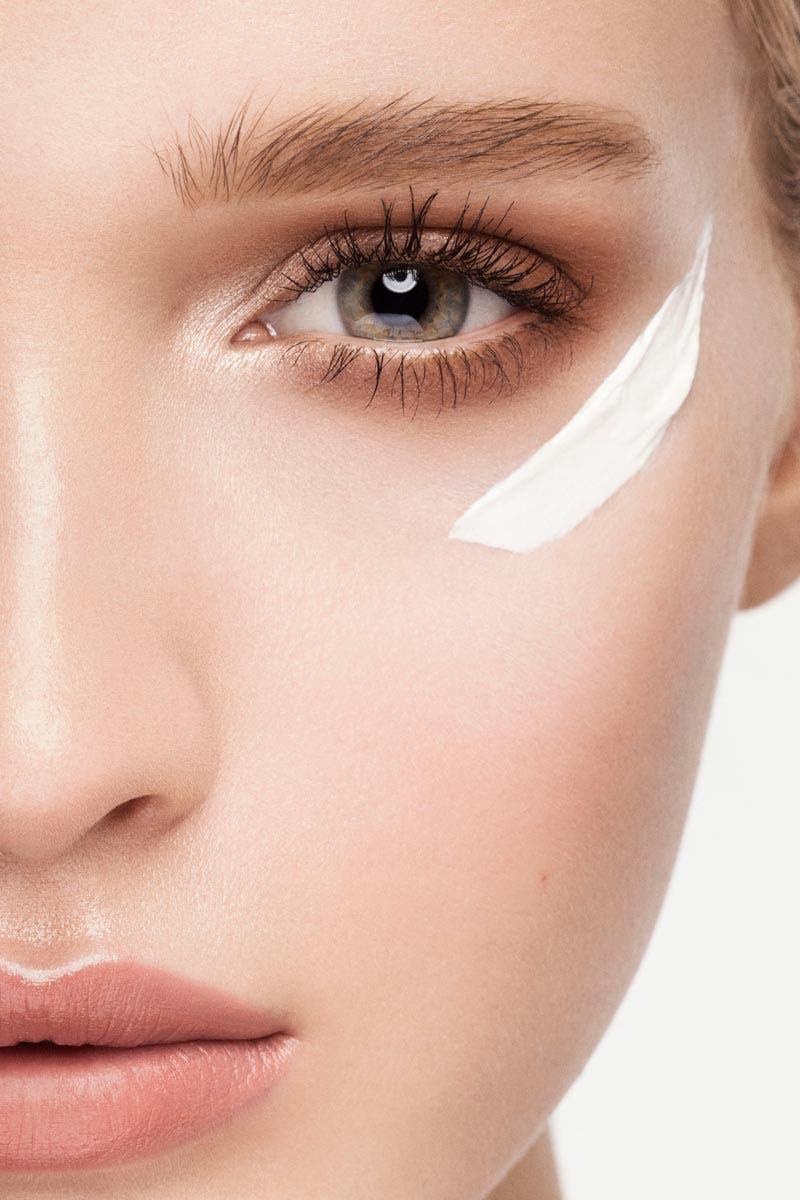
Macro beauty photography is extremely inspiring because you can showcase stunning elements that sometimes go unnoticed to the eye. I can capture beautiful textures of makeup or glowing details on the skin to provide the viewer a closer look. You can frame close to the face, just the subject’s lips, or even a super closeup shot of part of the eye
Our series of camera designs includes the best lens for beauty photography as one of the largest manufacturers. As a website focused on giving you the best cameras, solaroid aims to provide the most stylish and extravagant cameras for you. Our experts analyze the globe to find the most beautiful and unique cameras and feature them on solaroid. There are many unique cameras in our collection, including best nikon lens for beauty photography, best camera lens for makeup photography, and best camera for beauty photography.
We have the macro beauty photography anywhere in the world, with great designs, values, and styles. The designs of cameras vary widely. The solaroid official website is the best place to shop for the camera settings for beauty photography. Our cameras are among the most popular on the market. You can find the best wide angle lens for sony a7iii on our site. Choose from a variety of camera designs available now for best beauty dish. Choose now!
Macro beauty photography — a type of macro photography — allows me to get creative and show a unique perspective on the face, but it certainly comes with its challenges. In this article I’d like to share my favorite tips on macro beauty photography including lens choice, angles, and depth-of-field. I specialize in beauty photography and have shot dozens of campaigns for skincare brands, eyelash companies, foundations lines and much more. Now I want to pass that expertise on to you and let you know the special considerations to watch out for. Let’s dive in!
1. Be aware of very narrow depth of field
Aperture:
With macro photography you are working with extremely narrow depths of field… sometimes even millimeters!
Some photographers love shooting wide at F/2.8 but that is going to be extremely difficult with macro photography. The depth of field may be so narrow that nothing appears in sharp focus.
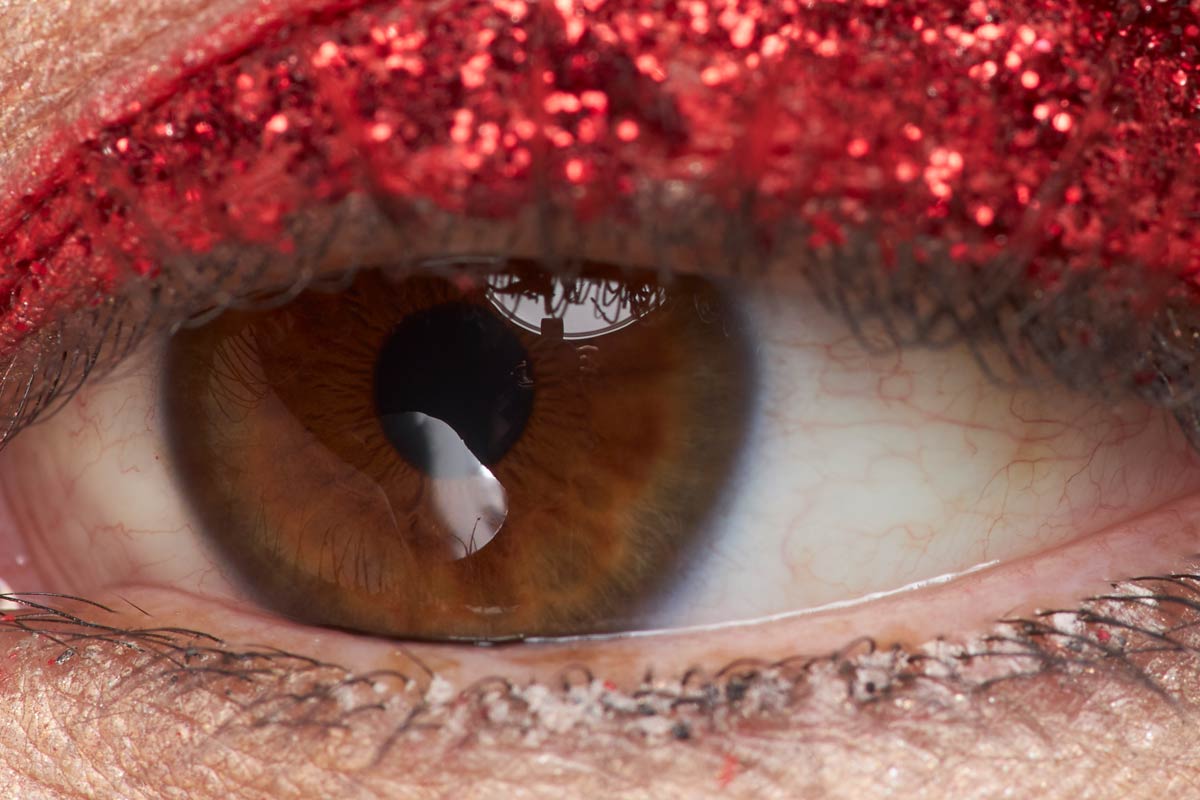
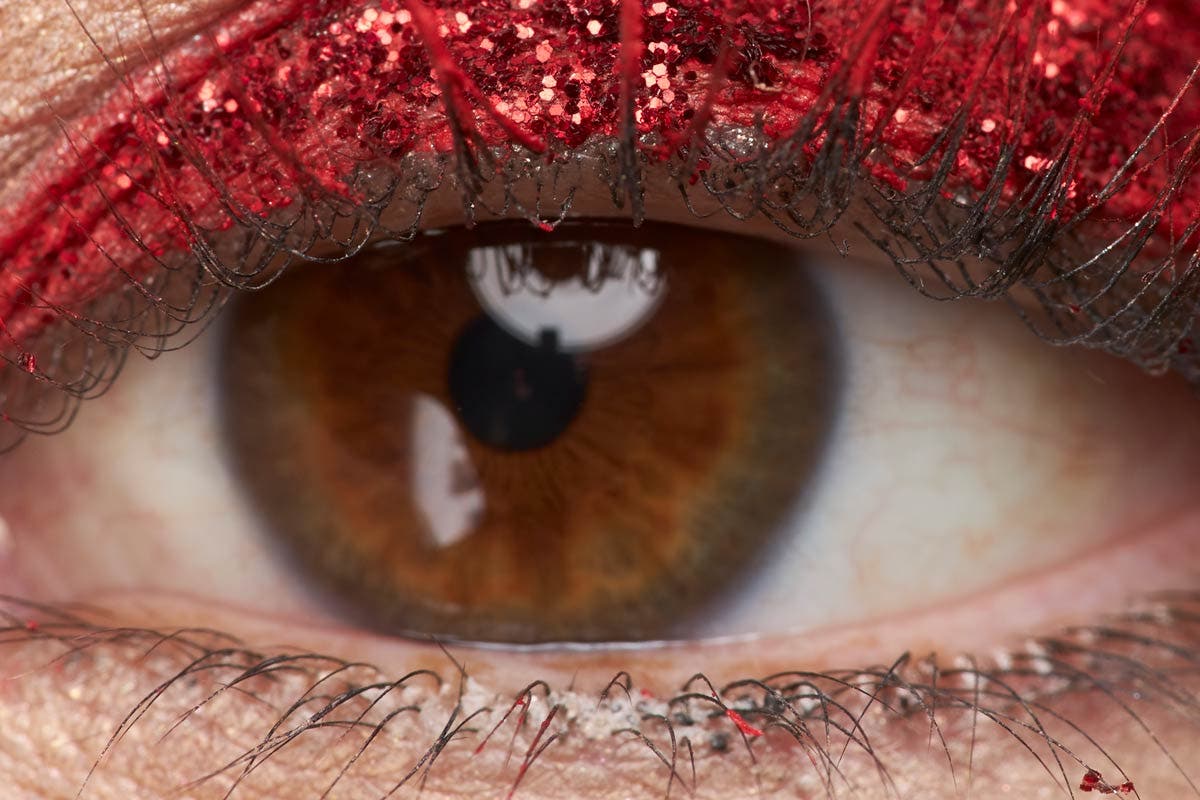
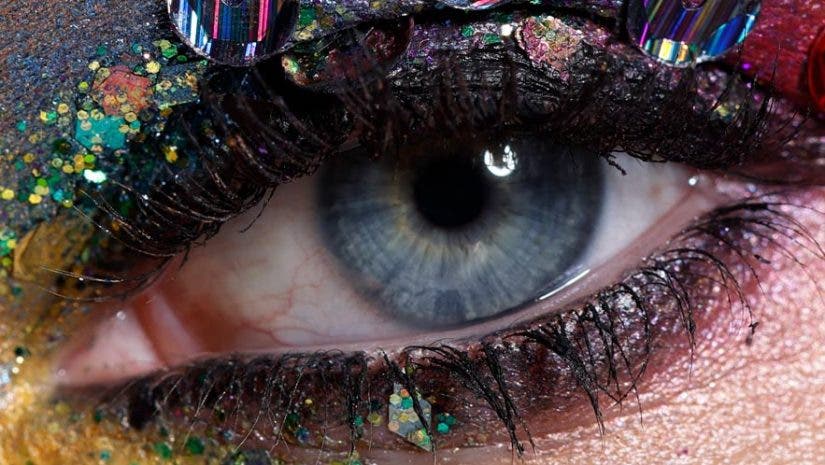
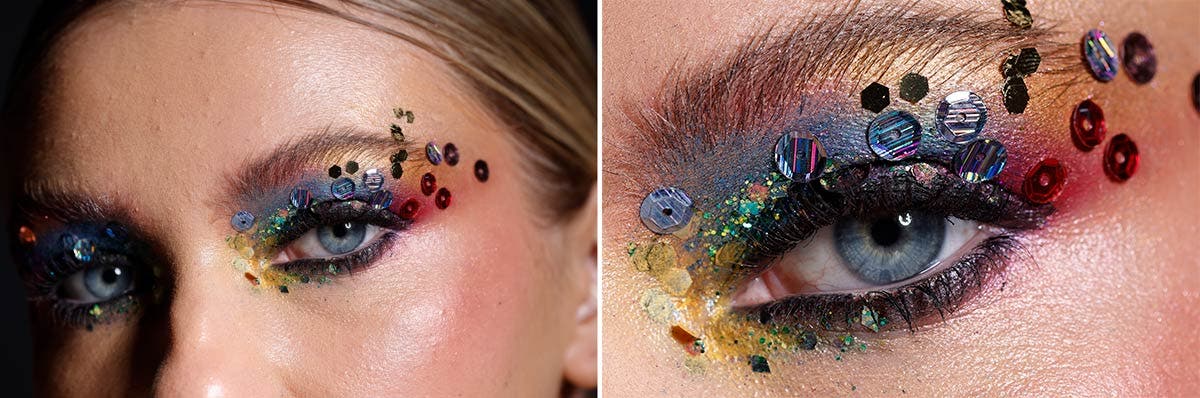
Compare these two super closeup shots. Both are shot with the exact same lens, aperture (F/8) and same distance from camera. Notice that when I focus on the pupil, the eyelashes are out of focus. When I focus on the eyelashes, the pupil is out of focus. Even at F/8 I am working with a tiny depth of field.
Typically F/2.8 is going to provide you with a lot of focusing challenges, and instead I recommend F/11 as a starting place to give you a bit of flexibility. From there you can certainly go wider but that will be a good place to begin.
If you don’t know much about depth of field, there are a few apps and websites that allow you to input different criteria and determine the actual depth of focus you are working with.
Your aperture, focal length, and distance to subject all affect depth of field. The longer your focal length, the narrower your depth of field. The wider your aperture, the narrower your depth of field. The closer you are to your subject, the narrower depth of field.
In macro photography, you are often working with a longer focal length (100mm, 180mm) and very close to your subject, meaning you already have a minimal depth of field to work with. Try to plug in the variables here to see how it affects the results. They may surprise you! For example, if I am working with a 100mm macro lens at one foot away from the subject (common with macro lenses) at F/2.8, my depth of field is only .04 inches. Tiny!
Distance to subject:
Another option to increase functional depth of field is to back away from your subject even just a tiny bit for a slightly wider composition and then crop tighter in post. It’s a balance, you get more depth of field, but of course you are wasting pixels if you have to crop drastically in post-processing, so do this sparingly. That’s why the Canon EOS R5 is such a great choice when shooting macro. Those 45 megapixels give you flexibility to crop in later (check out my hands-on review of the camera here).
In the past I’ve been hired to shoot eyelash campaigns where I needed the eye and the eyelashes completely in focus. Even at F/16, I needed to back up a bit and crop in to have everything completely sharp.
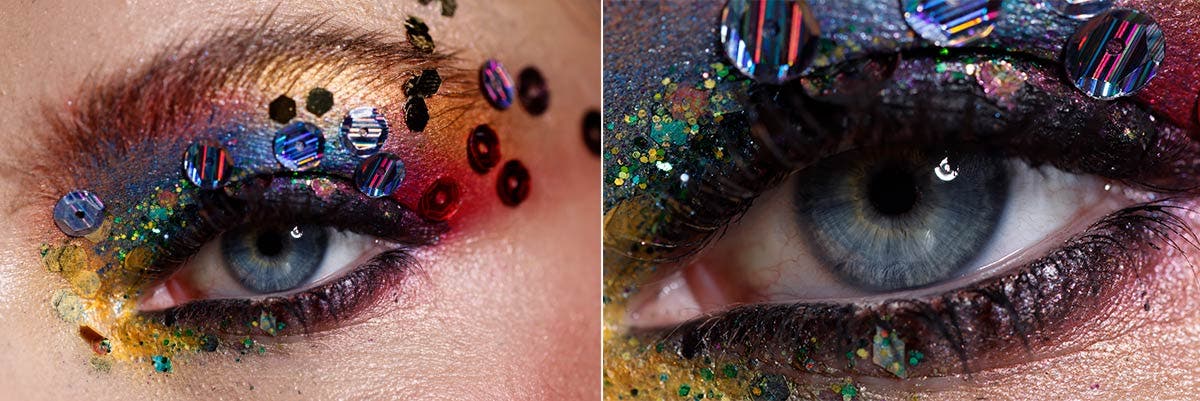
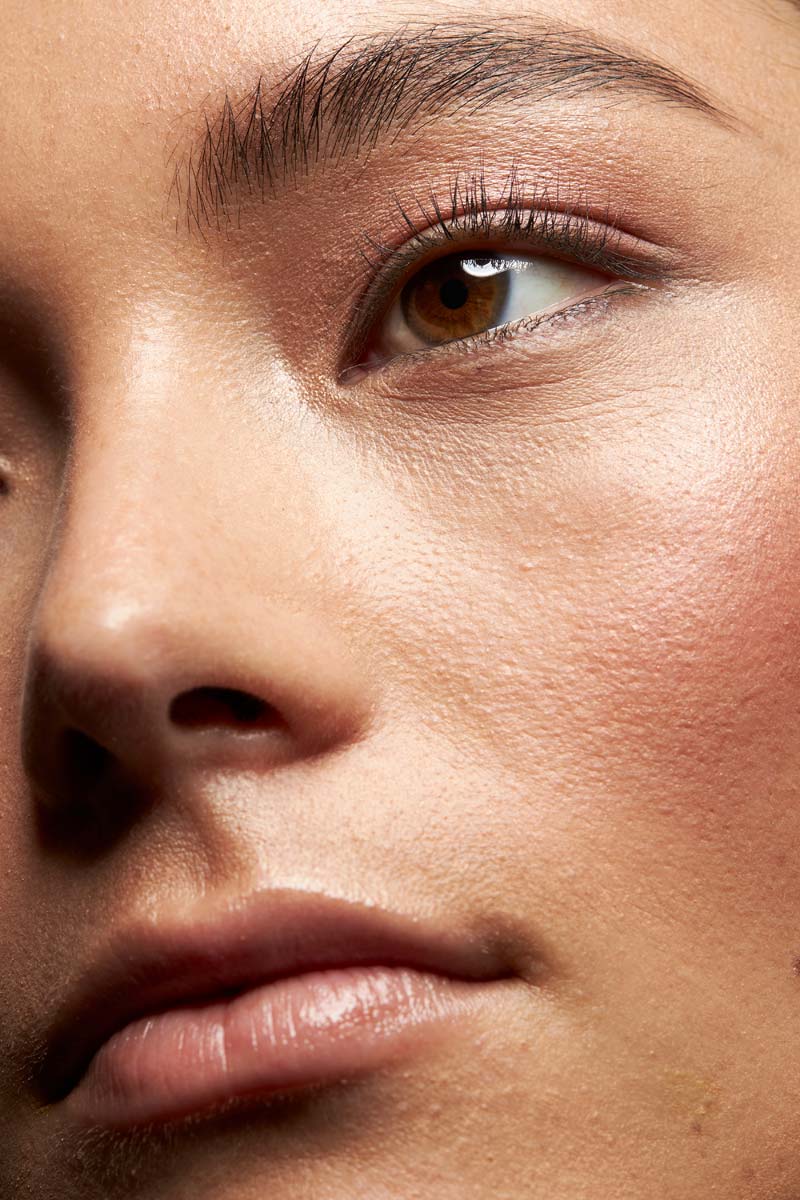
Let’s take a look at this in practice. In the first image above, I filled the frame with the eye in camera with my initial crop. Notice when we zoom in to take a closer look, the eyelashes are out of focus.
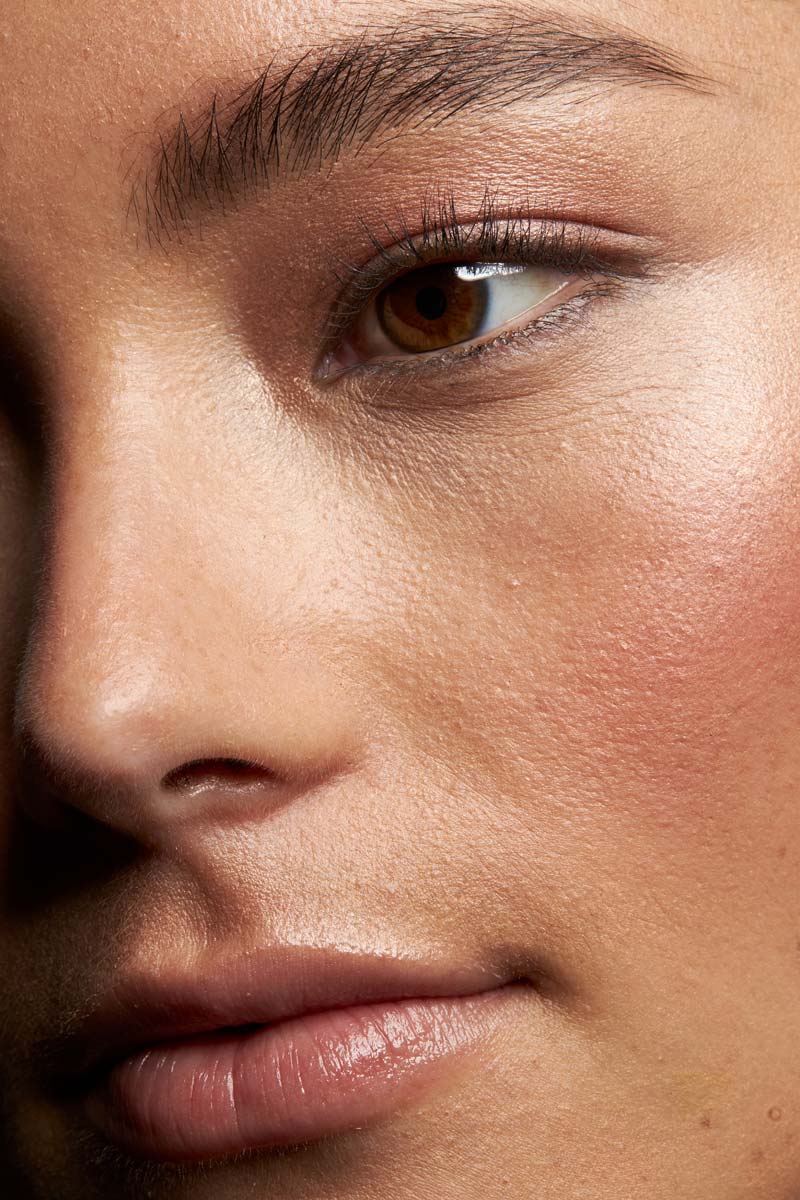
Let’s take another example where I shoot the same image, same depth of field and same lens. The only difference is that I shoot a looser composition the second image above. When we crop into the eye now we can see that the eye and the eyelashes are now in focus. Backing up a bit, away from our subject, effectively creates more depth of field. Please be wary of wasting too many megapixels and information.
Plane of focus:
Our next consideration is working with our plane of focus. Basically, envision that there is this imaginary plane that is parallel to your camera’s sensor. Wherever you focus is your plane of focus, and it is only as deep as your depth of field. In other words, whatever is the same distance from the camera and on the plane of focus is what will be sharp.
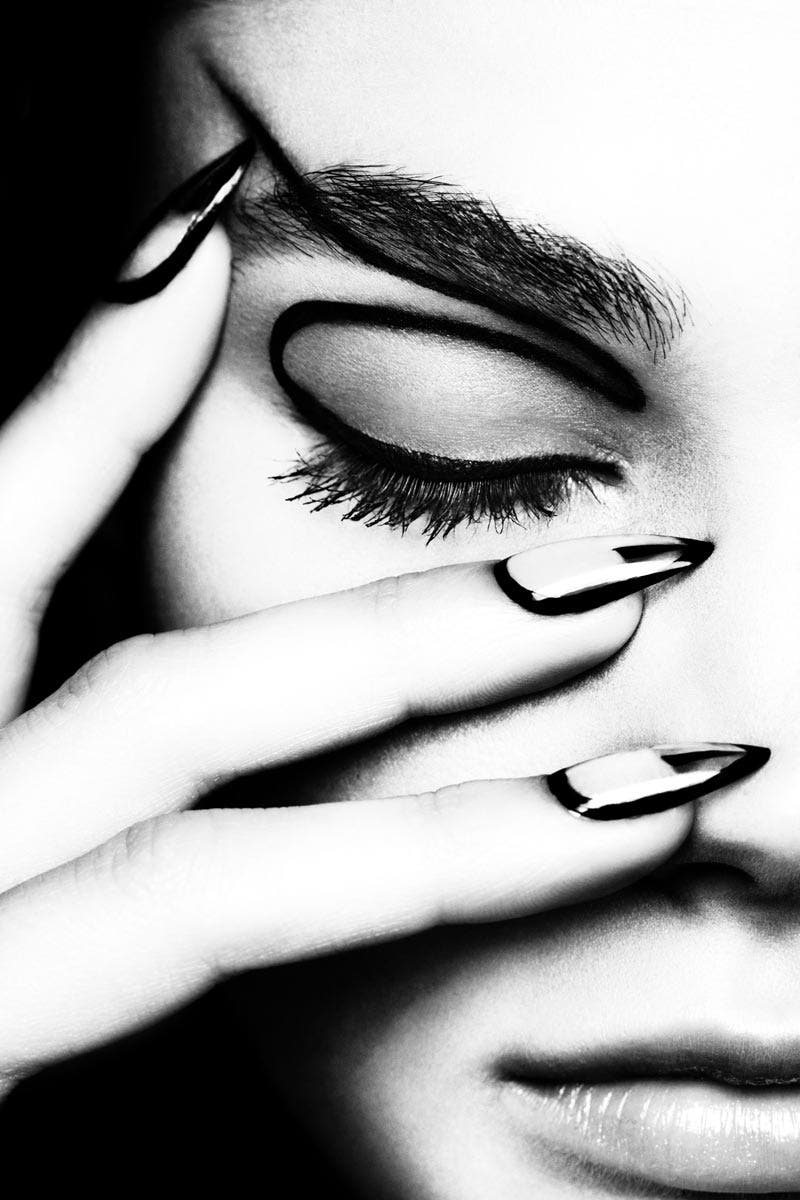
Here’s a straightforward example. In the shot above, I am tight on my subject shooting around F/4. Even though I am shooting at F/4, notice how the left eye is out of focus. The subject’s head is turned very slightly so that the eyes are not on the same focal plane (the left eye is further from the camera) and therefore it is slightly out of focus. You certainly do not always need both eyes to be in focus, but in this example it is very disconcerting to have one eye just barely soft (looks like an accident).
Let’s say for a particular shot you need to have both the eyes and the lips in focus. You’ll need to be sure that one is not much closer to the camera than the other. If the subject is tilting their head too much or your camera is too high or low, this may actually make it difficult to achieve focus on both elements in focus.
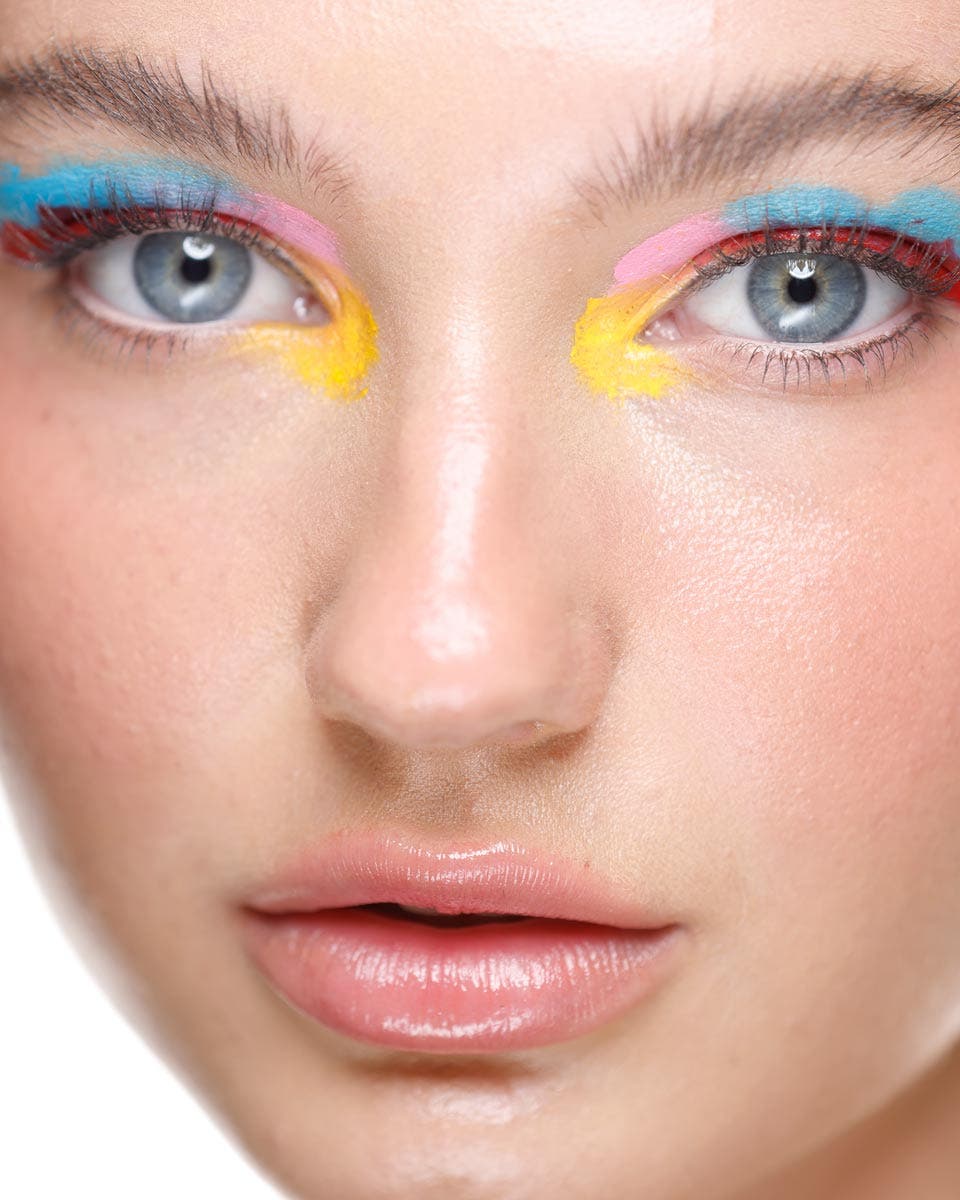
In these images I am shooting at F/11 to give myself a greater depth of field. In the first shot I am shooting at a lower camera angle with the lips closer to the camera. I can only choose one element (the lips or the eyes) to be in focus. I chose the eyes to be in focus because the slight softness of the lips is not distracting.
Next, I raise my camera angles slightly so that the eyes and lips are equidistant from the camera (on the same plane). Notice how both of the elements are now sharp.
Play around with the camera angle and subject’s pose to try to get both elements on your plane of focus (equidistant from camera). The narrower your depth of field, the harder this will become to achieve.
2. Selecting focal length
Telephoto Vs Macro:
Let’s start by talking a bit about the differences between a macro lens and a telephoto lens. For a lot of beauty photography, using something like a 70-200mm lens is going to be a great choice. It’s versatile and you can get a nice tight headshot. With the Canon EOS R5, I have the ability to crop in to showcase some beautiful details because this camera captures 45 megapixels.
Even though it is technically a shorter focal length (180 vs 200mm), it allows me to focus much closer and even magnify my subject. I can move in so that I can capture just the eye at life size or even a portion of the eye in the frame without cropping. The detail is incredible.
So, typically if I am doing a headshot, I’ll grab the 70-200 but if I need just a shot of the eye or lips or half of the face, I’m straight to a macro lens.
Most camera and lens manufacturers have several focal lengths to choose from in their line of macro lenses, and the one you choose makes a big difference in two ways; your compression and working distance.
Compression:
As you probably know, if you take a 35mm lens and try to shoot a tight portrait, it distorts the face in an unflattering way. Typically you end up selecting a portrait lens with a slightly longer focal length like an 85mm because of the more pleasing compression. Now, imagine you can take a 35mm macro lens, get insanely close to your subject (like macro close) and take an image. The distortion will be even more exaggerated. When selecting a focal length for a macro lens, the same ideas of compression apply. A longer focal length will have more compression than a shorter one. I personally recommend selecting 100mm or longer to achieve pleasing close-up results.
Working distance:
Choosing a longer focal length gives you more working distance between you and your subject. Let’s take two very popular macro lenses: the Canon 100mm macro and the Canon 180mm macro. To fill the frame with the subject’s eye (and nothing else in the frame), I have to be very close to my subject. When I am filling the frame with the 100mm macro lens, I am mere inches away from my subject whereas with the same composition with a 180mm macro lens, I have a more comfortable distance between my subject and the lens.
Many wedding photographers prefer a 100mm macro lens because it is sharper and it is also easy to back up and achieve a full headshot. They can quickly move between a closeup on a wedding ring to a portrait of the bride with a few steps. With super closeup beauty shots of the eyes or lips, I usually prefer a longer 180mm macro lens because I can give my subject more breathing space and I don’t have to worry about obstructing my strobes.
3. Have a concept and a team
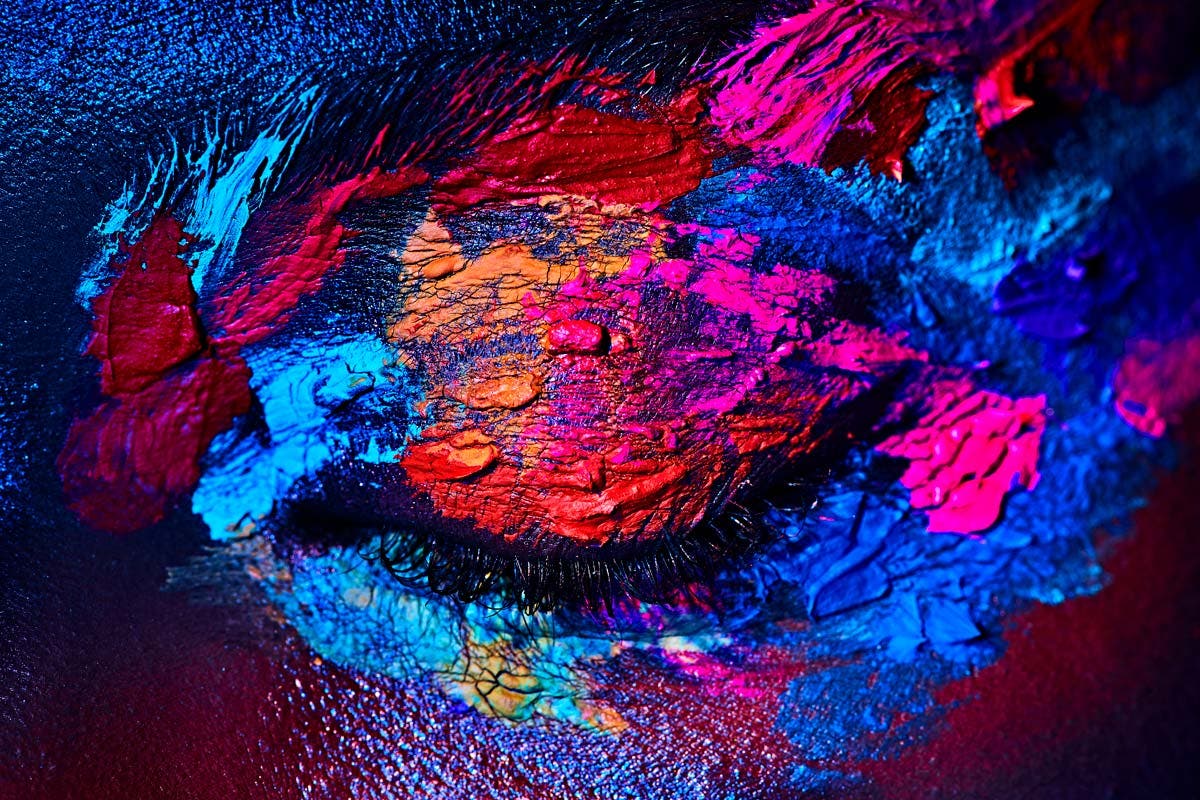
This final tip is not technical or gear-related, but conceptual! If you are going to take a macro beauty shot, do so for a reason. What are we looking at? The freshness of the skin? The rich texture of makeup? A feature on a product? Whatever reason you are shooting macro, be sure that the light, makeup, and composition reinforce your concept. When you don’t know the concept of the image, that’s when you can suffer from far too much going on in your shot or far too little. There is no right or wrong with beauty lighting. It’s what fits your concept.
So far I haven’t mentioned your creative team. This is one of the most important elements of the entire shot. Spend time testing and finding makeup artists with the talent to flatter your subject and to help you achieve your concept. When you get up close, “bad makeup” is going to be extremely noticeable. There is no way to hide it. Your creative team will become indispensable.
Summary
As you can see, there are several things to think about when trying your hand at macro beauty photography. It will take practice and most people find it challenging when they first give it a try. But, as with anything, give yourself time to practice and perfect it. If you’d like to learn about beauty lighting and techniques, check out my Beauty Lighting Recipe Guide. Stay tuned for more on this topic!
Gear Referenced:
- Camera: Canon R5 ()
- Zoom lens: Canon EF 70-200mm f/2.8L USM Lens ()
- Macro lens: Canon EF 100mm f/2.8L Macro IS USM Lens ()
- Macro lens: Canon EF 180mm f/3.5L Macro USM Lens
Looking for more lighting techniques? Check out our article on How to Light Your Space for Full-Length Portraits, Beauty & Motion Shoots.


